Salt Spray Compliance Analysis: Laser Marking vs Inkjet Coding
This technical guide compares laser marking and inkjet coding under salt spray testing conditions. It covers corrosion mechanisms, marking durability, substrate compatibility, post-treatment processes, salt spray performance at different exposure times, and process selection for different industrial environments.
Technical Overview
Applicable Standards: GB/T 10125-2021 Neutral Salt Spray Test (NSS), Acetic Acid Salt Spray Test (AASS), and Copper-Accelerated Acetic Acid Salt Spray Test (CASS).
Core Acceptance Criteria:
- The substrate must show no red rust, white rust, pitting corrosion, or corrosion propagation.
- Marking characters must remain complete and clear, without blurring, peeling, bleeding or staining.
- Codes must remain 100% identifiable by scanning or visual inspection.
- No coating peeling or blistering is allowed.
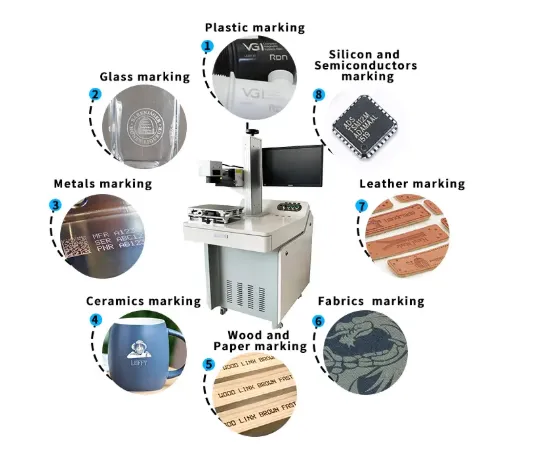
Applicable Substrates: Carbon steel, hot-dip galvanized/electro-galvanized steel sheet, 304/316 stainless steel, aluminum alloys including die-cast aluminum and aluminum profiles, and electroplated components.
Application Environments: Indoor storage, general industrial environments, outdoor automotive components, coastal environments, marine vessels and high-voltage new-energy components.
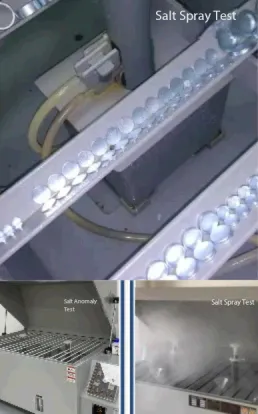
Table of Contents
1. Failure Mechanisms of Two Marking Processes Under Salt Spray Testing
1.1 Failure Mechanisms of Laser Marking
1. Substrate Corrosion — The Primary Problem
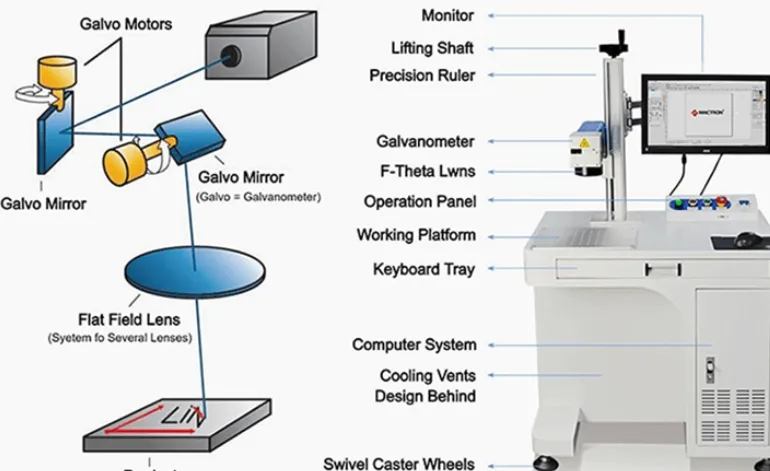
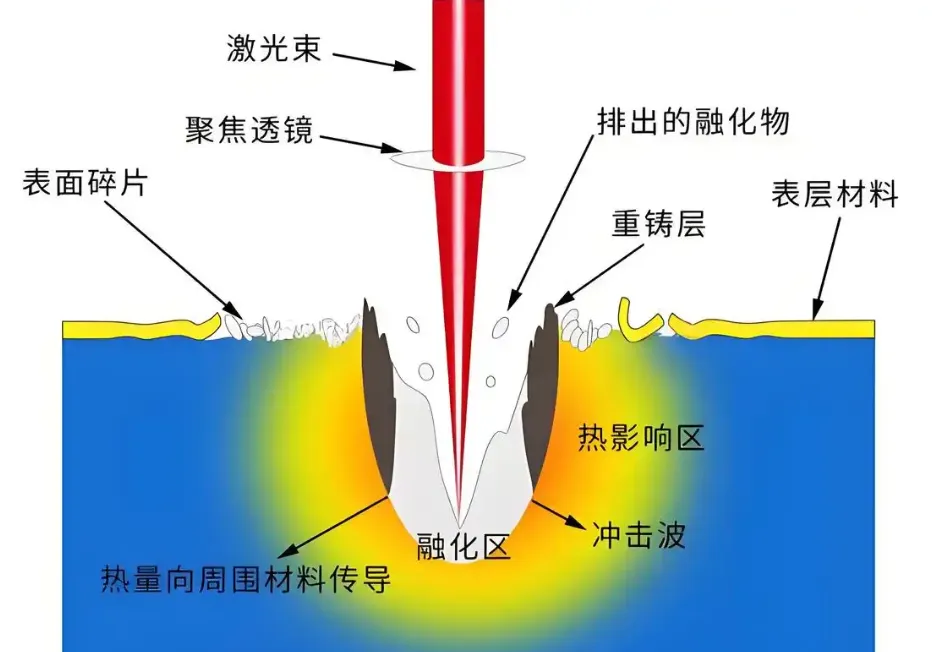
High-temperature laser ablation can damage the original corrosion-protection layer on the substrate, such as a zinc coating, anodized film, paint layer or passivation film.
Once the underlying metal is exposed, it can undergo electrochemical corrosion when exposed to salt spray containing 5% NaCl with a pH of approximately 6.5–7.2.
Deep engraving can also create microscopic pores and gaps where salt spray solution can remain. This can accelerate localized pitting corrosion. As corrosion develops around or beneath the marking, rust can eventually cover the characters and reduce visual readability.
2. Marking Blur — Relatively Rare
Laser marking is generally based on physical or chemical modification of the substrate itself, so the marking normally does not fade in the same way as ink.
Identification failure generally occurs only when corrosion products, rust or salt deposits completely cover the characters. Unlike ink-based processes, there is no ink film that can simply dissolve in the salt spray solution.
1.2 Failure Mechanisms of Inkjet Coding
1. Substrate Corrosion
Ink films naturally contain microscopic pores and pinholes. Salt spray solution can penetrate through these areas and reach the substrate.
If the edges of the marking are not properly sealed, crevice corrosion can develop, with corrosion often beginning around the edges of the characters.
2. Marking Blurring and Peeling — The Core Problem
Low-adhesion ink can hydrolyze and swell when exposed to salt spray. Ordinary solvent-based inks can have poor water resistance, resulting in bleeding, fading and discoloration.
Insufficient curing can also cause the ink film to blister or peel. Once salt crystals accumulate on the marking, the characters may eventually become difficult or impossible to identify.
2. Full-Duration Salt Spray Testing: Performance Grades and Differences
General Evaluation Rules
- Pass: No corrosion and clear identification.
- Minor Defect: Localized white rust on galvanized components or slight whitening around marking edges.
- Fail: Red rust, peeling of the marking, or inability to identify the marking.
- Test Environment: 35°C, continuous salt spray without interruption.
2.1 Laser Marking — Salt Spray Exposure Results
The following comparison is based on laser marking without post-treatment and with standard post-treatment.
| Salt Spray Duration | Test Level | Carbon Steel (Uncoated) | Galvanized Sheet | 304 Stainless Steel | Aluminum Alloy (Anodized) | Failure Summary |
|---|---|---|---|---|---|---|
| 24 h | Basic Indoor Level | Slight rust spots | No white rust, clear | Pass | Pass | Only slight rust on carbon steel; other substrates remain normal |
| 48 h | General Industrial Level | Large-area red rust | Slight white rust around marking area | Pass | Pass | Corrosion begins in the laser-affected area of galvanized components |
| 96 h | Medium Level | Fully rusted; rejected | White rust spreads and covers the marking | No rust, clear | No rust, clear | Carbon steel and galvanized sheet fail without post-treatment |
| 240 h | High Level | Rejected | Corrosion with perforation | Slight pitting at edges | Slight oxidation | Stainless-steel and aluminum components begin to show defects |
| 500 h | Severe Level | Not usable | Not usable | Localized pitting | Anodized layer damaged | Only 316 stainless steel with appropriate post-treatment can meet the requirement |
| 1000 h | Extreme Level | Prohibited | Prohibited | Minor localized corrosion | Post-treatment required | Without post-treatment, all substrates eventually fail |
Laser Marking Post-Treatment: Improved Salt Spray Resistance
According to the source test results, post-treatment using passivation and sealing can significantly improve salt spray performance.
The source reports that the pass rate of the tested substrates increased by approximately ten times under the corresponding conditions:
- Galvanized sheet: 240 hours without white rust
- 304 stainless steel: 500 hours without pitting
- Aluminum alloy: 1000 hours without corrosion
- Markings remained clear without being obscured by rust
2.2 Inkjet Coding — Salt Spray Exposure Results
| Salt Spray Duration | Test Level | Ordinary Solvent Ink | High-Adhesion Solvent Ink | UV-Curing Ink | Epoxy Anti-Corrosion Ink | Special Fluorocarbon Ink |
|---|---|---|---|---|---|---|
| 24 h | Basic Level | Slight discoloration | Clear and intact | Pass | Pass | Pass |
| 48 h | General Level | Character bleeding | Slight whitening at edges | No change | No change | No change |
| 96 h | Medium Level | Peeling; rejected | Localized peeling | Slight whitening | Intact | Intact |
| 240 h | High Level | Unusable | Failed | Edge peeling | No peeling; identifiable | No visible damage |
| 500 h | Severe Level | Prohibited | Prohibited | Peeling | Slight corrosion | Pass |
| 1000 h | More Severe Level | Prohibited | Prohibited | Prohibited | Localized failure | Long-term stable performance |
Inkjet Coding: Effect of Pre- and Post-Treatment
The source recommends chemical degreasing and plasma pre-treatment before inkjet coding. According to the source, this process can increase adhesion strength by 300% and reduce salt-spray penetration.
After marking, applying a protective clear coating can extend salt spray resistance and help address corrosion caused by microscopic pores in the ink film.
3. Dual-Process Approach: Corrosion Protection + Marking Clarity
3.1 Standardized Corrosion-Protection Process for Laser Marking
Core principle: Do not penetrate the corrosion-protection layer → optimize the laser process → seal the surface through post-treatment.
1. Equipment and Parameter Selection
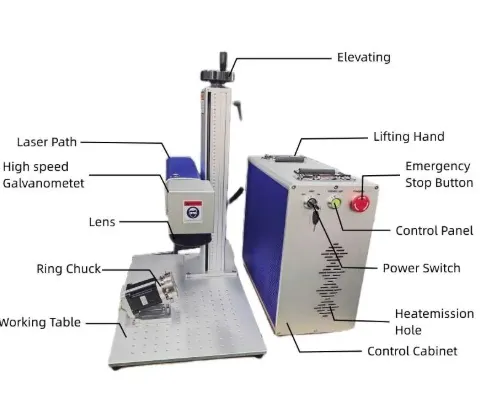
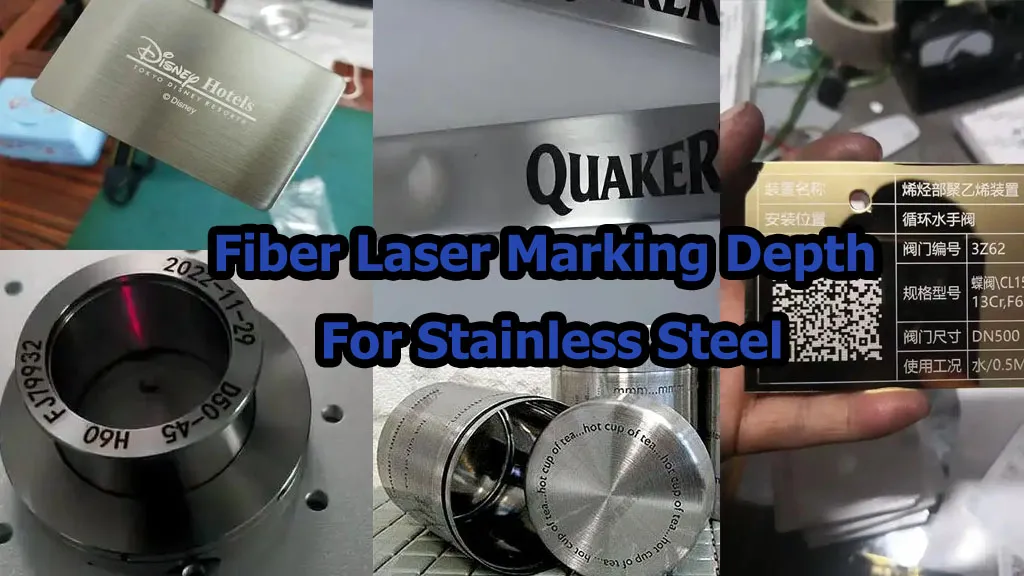
- For ordinary components: Use a fiber laser for low-power surface black marking or shallow engraving. The source specifies a marking depth of ≤0.01 mm and prohibits deep engraving.
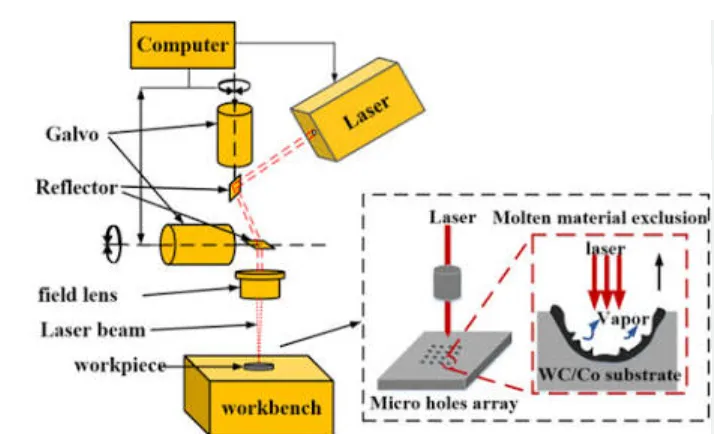
- For high-corrosion-resistance components: Use UV or picosecond laser processing for cold processing with reduced thermal damage, while avoiding damage to the anodized or galvanized protective layer.
- For coated components: Do not perform deep engraving after the protective coating has already been applied. The preferred sequence is to mark first and then perform overall electroplating or anodizing.
2. Required Post-Treatment According to Salt Spray Level
- Within 48 hours: No additional post-treatment is required according to the source; clean the surface with alcohol.
- 48–240 hours: Perform stainless-steel passivation according to ASTM A967. For aluminum alloys, use natural-color anodizing and seal the microscopic pores.
- Above 240 hours: Use passivation plus UV fluorocarbon clear-coat sealing to create a closed surface and isolate the substrate from salt spray and moisture.
3. Substrate-Specific Optimization
- Carbon steel: The source requires painting or galvanizing before shallow laser marking and prohibits laser marking directly on bare carbon steel.
- Galvanized aluminum-magnesium: The source recommends this material as an alternative to ordinary galvanized material and states that salt spray resistance can be improved by three times, with no white rust after laser marking under the stated process conditions.
3.2 Standardized Corrosion-Protection Process for Inkjet Coding
Core principle: Surface pre-treatment → ink selection → curing process → post-sealing.
1. Pre-Treatment — Mandatory Process
- Chemical degreasing + ultrasonic cleaning: Remove oil, dust and oxide scale.
- Plasma or corona treatment: Increase the surface dyne level to ≥38 dyn and address poor ink adhesion.
- Drying: Ensure that the substrate has no water stains or condensation to prevent accelerated hydrolysis under salt spray exposure.
2. Matching Ink Type With the Curing Process
- Solvent-based ink: Hot-air baking at 60°C for 10–15 minutes to fully evaporate the solvent.
- UV ink: UV lamp energy ≥800 mJ/cm² for rapid curing and reduced pinhole formation.
- Epoxy/fluorocarbon ink: Cure at room temperature for 24 hours or bake at 80°C for 30 minutes to create a dense film with minimal pores.
3. Post-Sealing Process — Required for High Salt Spray Resistance
After the marking has fully cured, apply a transparent anti-corrosion clear coat over the entire surface. The source specifies a thickness of 5–10 μm to seal the microscopic pores in the ink and prevent salt spray penetration.
4. Process Selection Guide by Application Scenario
The source identifies five major application scenarios and recommends selecting the process according to salt spray duration, substrate material, production efficiency, cost budget and marking durability.
Scenario 1: Low Requirement — ≤48 h NSS
Typical applications: Indoor hardware, electronic components and environments without moisture exposure.
1. Preferred Solution: Standard Fiber Laser Marking Without Post-Treatment
- No consumables
- Durable marking
- High production efficiency
- No rusting risk on the tested stainless-steel and aluminum components
2. Low-Cost Alternative: Standard High-Adhesion Solvent Inkjet Coding
Limitation: The source recommends this only for indoor applications and prohibits outdoor or humid environments.
Scenario 2: Medium Requirement — 48–96 h NSS
Typical applications: General machinery, appliance housings and ordinary automotive components.
1. Preferred Solution: Fiber Laser Shallow Marking + Passivation
The source states that this process is suitable for the listed metal substrates and provides clear, durable identification with no routine maintenance under the specified conditions.
2. Cost-Effective Alternative: UV-Curing Inkjet Coding + Plasma Pre-Treatment
The source identifies good compatibility with production lines, the ability to produce colored markings and moderate overall cost as the advantages of this approach.
Scenario 3: High Requirement — 96–240 h NSS/AASS
Typical applications: Outdoor equipment, new-energy equipment and automotive structural components.
1. Recommended Solution: UV/Picosecond Laser + Passivation + Fluorocarbon Sealing
The source states that the key advantage is avoiding penetration of the protective coating while maintaining corrosion resistance and marking clarity.
2. Inkjet Alternative: Epoxy Anti-Corrosion Ink + Full Pre- and Post-Treatment
The source notes that this alternative requires regular inspection to prevent damage to the protective film.
Scenario 4: Severe Requirement — 240–500 h NSS/CASS
Typical applications: Coastal environments, marine vessels and outdoor photovoltaic components.
1. Laser Solution: 316L Stainless Steel + In-Situ Picosecond Laser Marking + Passivation Sealing
The source prohibits carbon steel and ordinary galvanized sheet without post-treatment under this scenario.
2. Inkjet Solution: Special Fluorocarbon Anti-Corrosion Ink + Baking Cure + Double Clear-Coat Protection
According to the source, this is the ink-based solution capable of meeting the specified requirement under the stated process.
Scenario 5: More Severe Requirement — ≥500 h
Typical applications: Military equipment, marine engineering and high-end medical equipment.
Dedicated Solution
316L stainless steel + picosecond laser marking without coating removal + passivation + nano-ceramic sealing.
Prohibited According to the Source
- All inkjet coding processes
- Carbon steel or galvanized substrates
- Ordinary fiber-laser deep engraving processes
5. Laser Marking vs. Inkjet Coding: Comprehensive Salt Spray Comparison
| Comparison Dimension | Laser Marking (Optimized) | Inkjet Coding (High-Corrosion-Resistance Type) |
|---|---|---|
| Maximum Salt Spray Resistance | 1000 h+ under the stated 316L + post-treatment process | 500 h under the stated fluorocarbon-ink process |
| Marking Durability | Durable; resistant to fading and peeling | Long-term performance can be affected by coating damage |
| Substrate Corrosion Risk | Low when the protective layer is not penetrated | Medium; microscopic pores may allow corrosion |
| Production Efficiency | High for static marking applications | Very high for inline coding applications |
| Overall Cost | Higher equipment cost; no marking consumables | Lower equipment cost; ongoing ink and consumable costs |
| Core Applications | Long-term metal identification, high salt spray and high corrosion-resistance requirements | Non-metal materials, colored identification and high-volume inline production |
6. Root-Cause Solutions for Common Salt Spray Test Failures
6.1 Laser Marking — Corrective Actions
1. Rust Appears at the Marking Area
Reduce the laser power and use shallow marking, followed by passivation and sealing. The source also recommends considering galvanized aluminum-magnesium substrate as an alternative material.
2. Characters Become Covered by Rust
Avoid deep engraving and use post-treatment to seal microscopic pores across the marking area.
3. Aluminum Alloy Shows Oxidation or Corrosion
Perform anodizing again after marking when appropriate and avoid damaging the original protective oxide layer.
6.2 Inkjet Coding — Corrective Actions
1. Ink Peeling
Increase plasma pre-treatment and improve curing energy or baking time.
2. Character Bleeding
Switch to UV or epoxy ink and avoid ordinary solvent-based ink for demanding salt spray applications.
3. Rust Appears Around Character Edges
Apply a clear protective coating over the entire surface after marking to seal gaps around the marking edges.
Conclusion
Salt spray performance is not determined by the marking technology alone. The final result depends on the interaction between the laser or ink process, substrate material, surface treatment, marking depth, curing or passivation process, and final sealing process.
For laser marking, the key principle described in the source is to avoid unnecessarily damaging the corrosion-protection layer. Shallow marking, suitable laser selection and appropriate post-treatment can help reduce corrosion risks under demanding environments.
For inkjet coding, surface preparation, ink selection, curing and final sealing are critical factors in maintaining marking adhesion and preventing salt spray penetration.
The appropriate solution should therefore be selected according to the required salt spray duration, substrate, production volume, marking durability and overall cost requirements rather than simply choosing between laser marking and inkjet coding based on equipment price.