Industrial Buying Guide | JQ Laser
High Speed Industrial Laser Marking Machine for Production: 9 Questions to Ask Before Buying
Quick answer: If you need a laser marking machine for continuous production, do not buy on the basis of advertised scanning speed alone. Start with your required parts per minute, the material and surface finish, the mark size, and the quality standard. Then test the complete cycle, including loading, positioning, marking, inspection and unloading.
For many metal parts, a 20W or 30W fiber laser is a sensible starting point for serial numbers, logos, QR codes and routine identification. A 50W system is worth evaluating when the marking cycle or engraving depth becomes a bottleneck. A 100W system may make sense for demanding material removal or high-volume applications, but only when a real test shows that the extra investment improves accepted output.
At JQ Laser, we recommend starting with the actual workpiece and production target—not choosing the largest wattage first. This guide explains the nine questions we would ask before preparing a production-machine quotation.
Start Here: What Does “High Speed” Mean in Your Factory?
A laser scanner may be rated at several thousand millimeters per second, but that figure does not tell you how many finished parts your line can deliver per hour. The scanner moves along the marking path; the production system also has to locate the part, apply the correct data, complete the mark, verify the result and release the part.
For example, a machine that marks one part in 4 seconds is not necessarily a 900-parts-per-hour solution. If loading, positioning, code verification and unloading add another 11 seconds, the complete cycle is 15 seconds. The theoretical rate is then 240 parts per hour before downtime and rejected marks are considered.
Use this formula for an initial estimate:
Theoretical parts/hour = 3,600 × parts per cycle ÷ total cycle time in seconds
For a more realistic estimate:
Accepted parts/hour = theoretical parts/hour × availability × first-pass yield
Availability and first-pass yield must come from your own production data or a clearly defined trial. Do not use assumed values as a supplier guarantee.
Question 1: What Material and Surface Finish Will You Actually Mark?
When this matters
This is the first question because “metal” is not one consistent laser-marking material. Stainless steel, aluminum, brass, copper, coated steel and anodized aluminum can react differently to the same settings. Even two stainless-steel parts can produce different contrast if one is polished and the other is brushed or heat-treated.
How to verify it
- Provide the exact material grade when available, not only a broad description such as “steel.”
- Send samples with the same surface finish, coating and treatment used in production.
- Test the required mark on several samples, including normal variation between batches.
- Record the laser source, power, lens, speed, frequency, pulse settings where applicable, line spacing, number of passes and observed result.
Practical production example
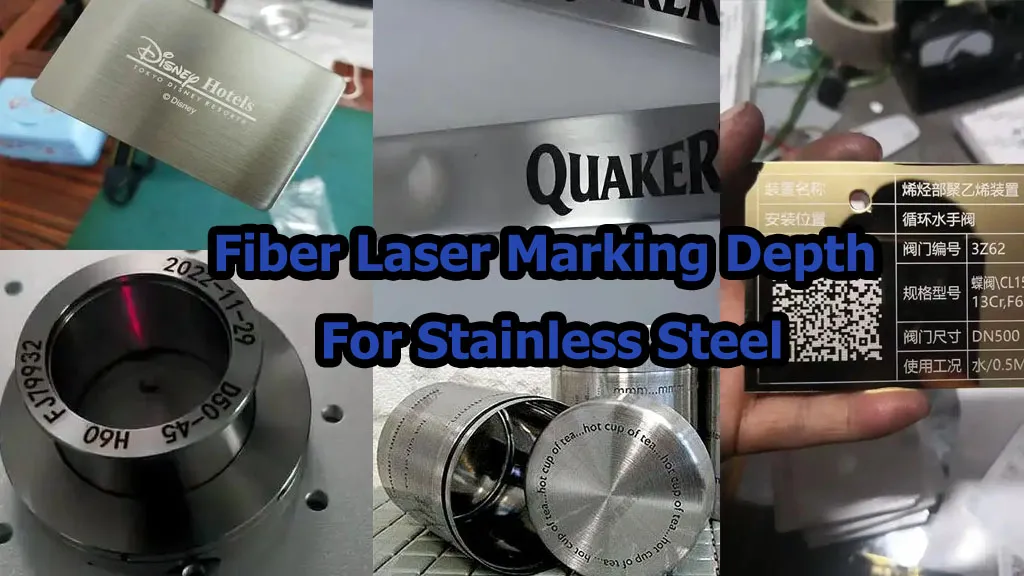
For stainless-steel fittings that need a permanent serial number, a conventional fiber laser may be suitable. If the customer needs a controlled black annealed appearance rather than a light engraved mark, a MOPA fiber laser may be worth testing. Neither configuration should be selected on the material name alone.
Limitations
A successful test on one alloy or finish does not prove that every material in the same category will behave identically. If suppliers or production sites change the material grade or surface treatment, revalidate the marking parameters.
Question 2: Do You Need Surface Identification, Black Marking or Deep Engraving?
These are different jobs. A machine that quickly marks a serial number on the surface may not be the best choice for removing metal to a specified depth. Deep engraving usually involves more material removal, often through multiple passes, and can change the required cycle time significantly.
| Production requirement | Configuration to evaluate first | What to test | Important limitation |
|---|---|---|---|
| Serial numbers, logos and routine identification | 20W or 30W fiber laser | Contrast, smallest feature, cycle time and durability | Actual speed depends on artwork and material |
| Higher-volume routine metal marking | 30W or 50W fiber laser | Accepted parts per hour and mark consistency | More power does not guarantee proportionally higher throughput |
| Black marking on selected stainless-steel surfaces | MOPA fiber laser for comparison | Color/contrast, heat effect, legibility and repeatability | Results depend on alloy, finish and parameter window |
| Deeper engraving or greater material removal | 50W or 100W fiber laser, subject to testing | Depth, edge quality, cycle time and dimensional effect | Depth cannot be guaranteed from wattage alone |
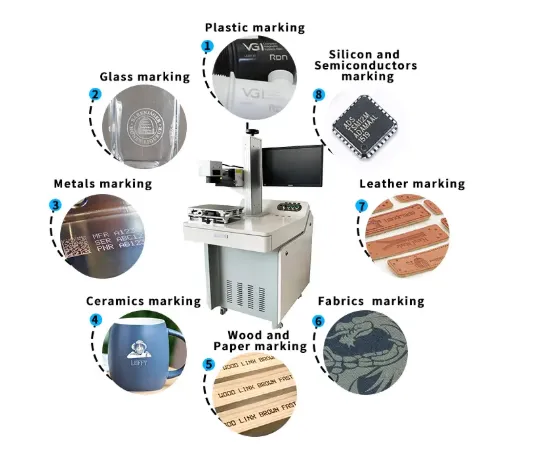
| Heat-sensitive plastics or fine marks on certain non-metals | Evaluate UV or another suitable laser type | Surface damage, contrast, readability and production rate | Fiber laser is not the default answer for every material |
Buyer tip: Write the acceptance criteria into the sample-test request. “Good-looking mark” is too vague. Define whether the priority is contrast, depth, character size, code readability, corrosion resistance or cycle time.
Question 3: What Is the Required Cycle Time per Part?
When this matters
This is essential when the laser station must keep up with an assembly line, CNC machine, press, packaging process or robotic cell. The line may produce a part every 5 seconds, every 15 seconds or every minute. The correct solution changes with that target.
How to verify it
Ask the supplier to run the actual marking file on the actual workpiece. Time the whole sequence, not just the laser-on period:
- Part loading or transfer into the station.
- Positioning, clamping and focus-height confirmation.
- Data retrieval or variable-data generation.
- Laser marking.
- Code verification or visual inspection, if required.
- Part release, unloading and the next cycle.
For a production trial, record multiple consecutive cycles rather than reporting only the fastest run. Include the slowest normal cycle, any re-marking, fixture adjustments and interruptions.
Practical example
If the mark takes 3 seconds but part positioning takes 8 seconds, upgrading from 30W to 50W may have little effect on total throughput. A better fixture or automatic positioning system could deliver more benefit than extra laser power.
Limitations
A short demonstration is not the same as a sustained production-acceptance test. Agree on the test duration, number of samples, quality criteria and treatment of failed marks before comparing supplier results.
Question 4: Is 20W, 30W, 50W or 100W the Right Power?
For standard metal marking, the practical question is not “Which wattage is fastest?” It is “Which configuration meets the required cycle time and quality at an acceptable total cost?” The following table is a starting point for evaluation, not a substitute for sample testing.
| Fiber laser power | Typical starting application | Production situation to consider it | When not to upgrade automatically | Public market price reference |
|---|---|---|---|---|
| 20W | Serial numbers, logos, nameplates, QR codes and routine metal identification | Low-to-medium volume or moderate mark content | When tests already meet the target comfortably | USD 900–1,600 |
| 30W | General industrial metal marking and regular batch production | When additional processing capacity is useful | When loading, positioning or inspection is the real bottleneck | USD 1,100–2,000 |
| 50W | Higher-volume marking or jobs requiring more engraving capacity | When the tested cycle time or depth justifies the extra investment | For simple low-volume marks that 20W or 30W already handles well | USD 1,500–3,500 |
| 100W | Demanding material removal, deeper engraving and selected high-throughput applications | When production economics justify a higher-power configuration | When no measured bottleneck or depth requirement supports the upgrade | Request a configuration-specific quotation |
Price note: These are public market reference ranges for typical configurations, not a fixed JQ Laser quotation. The final price depends on the laser source and model, scanner, lens, marking field, enclosure, rotary axis, automation, vision, accessories and shipping terms. Confirm the current bill of materials and quotation validity with the supplier.
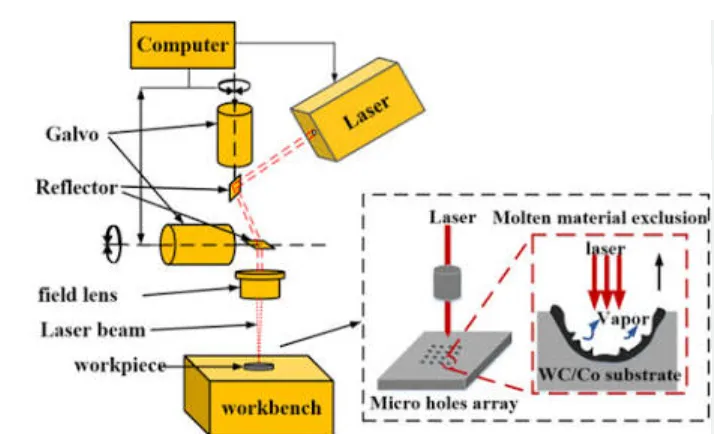
For reference, common JQ Laser fiber configurations use a 1064nm wavelength, air cooling on many standard systems, a 110 × 110mm standard marking field and a reference scanning speed of up to approximately 7,000mm/s, depending on configuration. Other lenses and marking fields may be available. The final specification must be confirmed for the exact model being quoted.
Important: A 100W source does not automatically make a complete marking station faster than a well-configured 30W station. Artwork, scanner, lens, marking field, material response, number of passes and handling time all affect the result.
Question 5: How Will Parts Be Positioned and Loaded?
In production, repeatable positioning is often just as important as laser power. If an operator places each part by eye, the mark may shift. If the part is tilted or its height varies, focus and readability can also change.
Choose the positioning method around the part
- Manual fixture: suitable for stable part geometry and lower-volume work when an operator can load and locate parts consistently.
- Dedicated nest or jig: useful for repetitive small parts, fasteners, brackets, housings and machined components.
- Rotary axis: useful for cylindrical parts when the mark must be placed on a round surface. Confirm diameter range, clamping method, mark location and whether the inside of a ring is optically accessible.
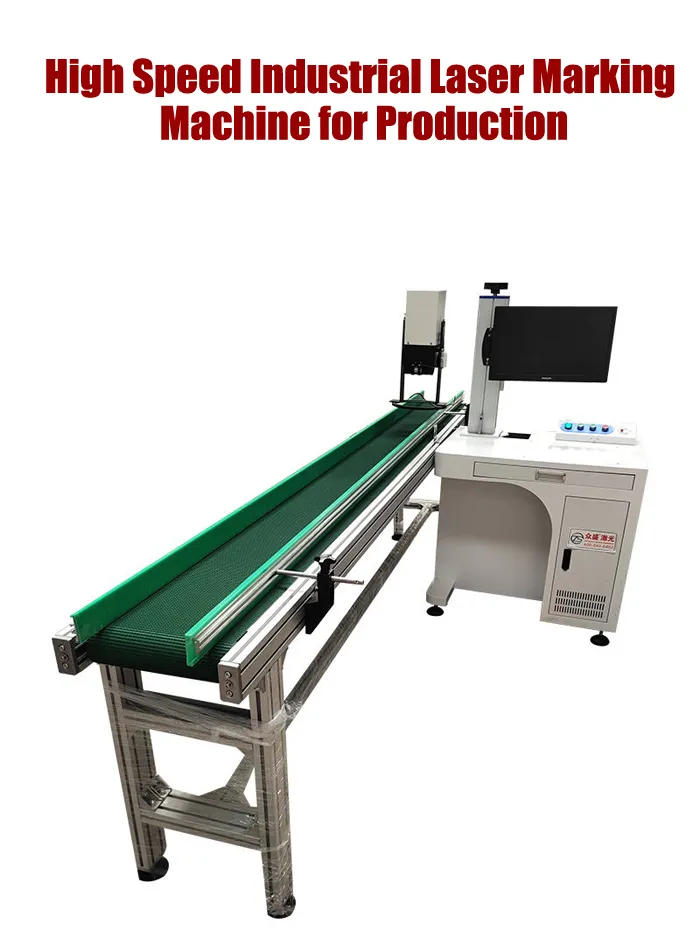
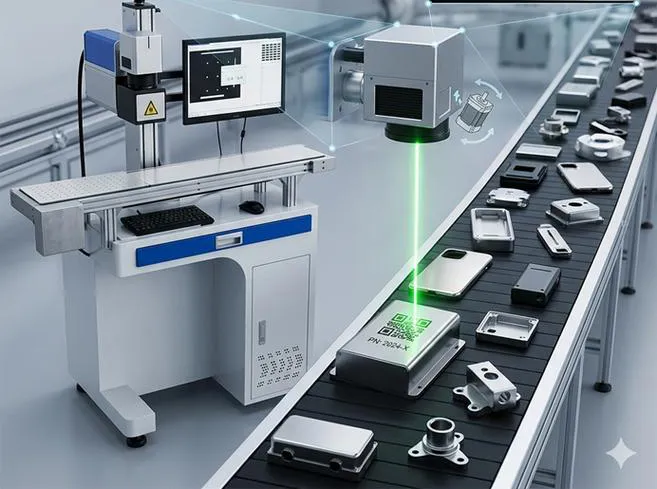
- Conveyor and sensor trigger: worth evaluating for a line with consistent part flow and a defined trigger position.
- CCD or machine vision: useful when part position, orientation or mark location varies. Vision does not eliminate the need for adequate contrast, focus and process validation.
- Robot or PLC integration: appropriate when the marking station must coordinate with upstream or downstream equipment.
Test method
Run parts at the expected minimum and maximum dimensional variation. Measure mark position against the drawing or datum, and record loading time, misloads, missed triggers and rejected parts. Test the actual production fixture, not a hand-held sample.
Limitations
Any stated positioning accuracy is configuration-dependent. Do not treat the laser scanner’s optical positioning figure as a guarantee of finished mark location on a production line. Fixture tolerances, robot repeatability, part variation, calibration and vision setup all contribute to the final result.
Question 6: Must the System Mark While Parts Are Moving?
There is a real difference between a stop-and-mark station and a mark-on-the-fly system. In a stop-and-mark setup, the part is positioned and held still during marking. In a moving-line setup, the system must coordinate marking with conveyor movement and product position.
| Production setup | Best starting point | Confirm before ordering |
|---|---|---|
| Operator loads one part at a time | Benchtop or enclosed station with a suitable fixture | Operator cycle time, safety enclosure and fixture repeatability |
| Parts arrive at a fixed station and pause | Automatic stop-and-mark system | Sensor trigger, PLC handshakes, clamping and release timing |
| Parts continue moving on a conveyor | Mark-on-the-fly system designed for moving products | Line speed range, encoder feedback, product spacing, tracking and mark distortion |
| Parts arrive in different orientations or positions | Fixture plus optional vision or robot positioning | Position variation, image-processing time, reject handling and recovery logic |
For conveyor marking, ask the supplier to demonstrate the minimum and maximum line speeds you expect, the shortest product spacing, the actual mark content and the required readability. A sensor alone does not guarantee correct marking on a moving product; timing and tracking must be engineered for the line.
For a system connected to an existing machine, prepare the I/O list and signal sequence before the quotation is finalized. Define what happens when a part is missing, a code cannot be read, the laser is not ready, or the downstream machine is stopped.
Question 7: How Will You Verify QR Codes, Data Matrix Codes and Serial Numbers?
For traceability applications, producing a visible mark is only one part of the job. The code must contain the correct data and remain readable under the customer’s actual inspection conditions.
Define the acceptance criteria
- Code type and content: QR, Data Matrix, serial number, date code or customer-specific format.
- Code size, module size, quiet zone and location on the part.
- Required contrast and whether the code must be readable after a downstream process.
- Inspection method: handheld scanner, fixed reader, vision system or a specified verification standard.
- Data source: fixed text, CSV/database, PLC, MES or another production system.
- Failure response: stop the line, reject the part, re-mark, or request operator review.
Test method
Mark a representative batch using the final artwork and production settings. Read every code with the intended scanner or inspection system. Record no-reads, duplicate data, incorrect data and any variation caused by part position or surface finish. If a formal code grade is required, agree on the verifier, standard and acceptance grade in advance.
Limitations
A code that scans on a phone is not automatically compliant with an industrial verification requirement. The reader, lighting, angle, surface curvature, code dimensions and applicable customer standard all matter. Do not promise a code grade before testing with the agreed method.
Question 8: What Evidence Will the Supplier Provide Before Shipment?
A quotation should describe the actual machine you will receive, not just a laser power rating. For a production system, ask for a configuration sheet and a test record that can be checked against the final order.
Request these items in writing
- Laser source brand, model, rated power and wavelength.
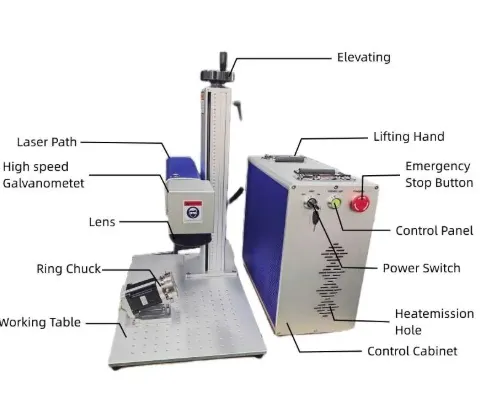
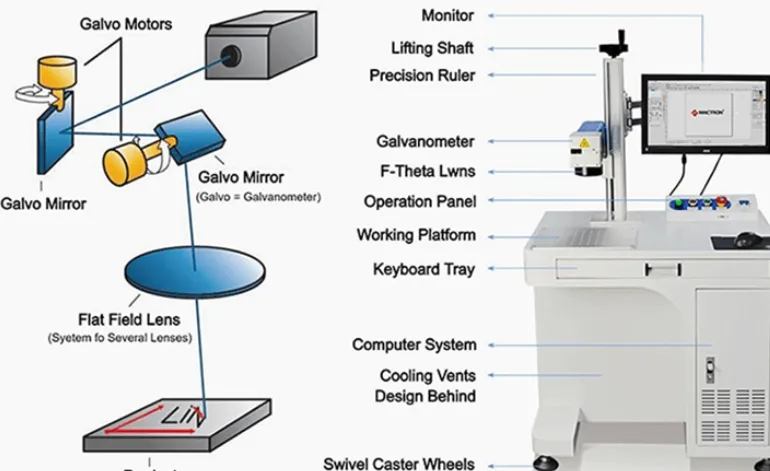
- Galvanometer scanner, F-theta lens and included marking field.
- Controller, marking software and file/data interface.
- Fixture, rotary axis, conveyor, sensor, PLC, vision and enclosure details, where applicable.
- Electrical input, safety provisions, exhaust requirements and installation conditions.
- Warranty scope, exclusions, spare parts, remote support and training arrangements.
- Lead time, packing, shipping terms and what is included in the quotation.
- Sample-test report, agreed cycle-time method and acceptance criteria.
Practical factory acceptance test
Before shipment, ask for a video or report showing the agreed workpiece, final marking file, measured cycle time and inspection result. For automated systems, include trigger behavior, PLC handshake, data changeover and recovery from a simulated fault where feasible.
Keep the report with the purchase order and machine configuration. If the laser source, lens, fixture or software changes after testing, ask whether the sample test needs to be repeated.
Limitations
A demonstration video is useful evidence, but it does not replace a written specification or a defined acceptance test. Make sure the test uses the configuration listed in the quotation.
Question 9: What Will the Machine Cost to Run—and What Happens When Production Stops?
The purchase price is only one part of the cost. A machine that is slightly cheaper but causes frequent line stoppages can be more expensive over its working life. Compare total cost around the production requirement, not just the initial equipment price.
Include these items in the cost review
- Laser system, enclosure, fixture, rotary axis, conveyor and automation hardware.
- Fume extraction or filtration, where required by the process and material.
- Installation, integration, operator training and commissioning.
- Planned maintenance, cleaning supplies, spare parts and replacement components.
- Downtime during changeover, fault diagnosis and maintenance.
- Rejected parts, rework, code inspection and traceability-system costs.
- Technical support response, remote troubleshooting and spare-parts delivery.
How to make a fair comparison
Ask every supplier to quote against the same scope: same material, artwork, marking field, fixture, line interface, inspection requirement, acceptance criteria and shipping basis. A lower price may simply exclude automation, guarding, extraction or integration work.
Ask the supplier to state the warranty period and its exclusions in writing. Also ask which spare parts are recommended for your production environment and how technical support is delivered. Avoid relying on an unqualified promise such as “lifetime service” without a defined scope.
JQ Laser recommendation: If the machine is part of a production line, settle the interface and acceptance requirements before purchase. It is much easier to define PLC signals, reject handling and sample-test criteria before manufacturing than after the machine arrives.
Production Application Examples: What Should You Test?
| Workpiece or industry | Typical marking task | Configuration to evaluate | Key production risk |
|---|---|---|---|
| Automotive and CNC metal components | Serial numbers, Data Matrix codes, logos and traceability IDs | 20W–50W fiber laser; fixture, vision or automation as required | Code readability, location repeatability and line integration |
| Fasteners, tools and hardware | Brand logos, batch IDs and part numbers | 20W or 30W for routine marks; 50W+ if depth or cycle tests justify it | Small marking area, part orientation and fixture loading time |
| Electrical enclosures and metal nameplates | Ratings, model numbers, serials and QR codes | 20W–30W fiber laser as an initial test configuration | Small characters, contrast and large artwork per plate |
| Stainless-steel components requiring a black mark | High-contrast identification or branding | Compare conventional fiber and MOPA fiber on actual parts | Surface finish, heat effect, appearance and cycle time |
| Deeply engraved tools, molds or industrial parts | Recessed text, durable identification or material removal | 50W or 100W evaluation, depending on target depth | Depth uniformity, multiple passes, heat and total cycle time |
| Parts moving on a production conveyor | Fixed or variable identification during product flow | Automatic system with sensor/encoder and appropriate control integration | Tracking, trigger timing, product spacing and reject handling |
These are starting configurations for testing, not universal prescriptions. The final selection depends on the material, surface treatment, artwork, production target and acceptance criteria.
Buyer Checklist: Use This Before Requesting a Quotation
- Workpiece: material grade, surface finish, dimensions, shape and normal variation.
- Mark content: logo, text, serial number, QR/Data Matrix or other code; attach the real file.
- Quality target: contrast, depth, smallest feature, location tolerance, durability and code-readability requirement.
- Production target: required parts per minute or hour, operating shifts and expected product mix.
- Timing: current marking time, target total cycle time and whether loading/inspection are included.
- Handling: manual fixture, rotary, conveyor, robot, PLC trigger or vision positioning.
- Data: fixed or variable content, data source, duplicate prevention and traceability requirements.
- Inspection: reader/verifier type, pass/fail logic and reject handling.
- Site conditions: electrical supply, available space, safety enclosure and extraction needs.
- Commercial terms: exact configuration, warranty, spare parts, lead time, shipping basis and acceptance test.
Sending this information at the beginning helps the supplier recommend a machine that fits your process instead of quoting a generic laser marker that may need expensive changes later.
Sample Test Report: What to Record
For a meaningful comparison between 20W, 30W, 50W or different suppliers, use the same workpiece, marking file and acceptance criteria wherever possible.
| Test item | Record |
|---|---|
| Workpiece | Material grade, surface finish, dimensions and batch |
| Machine configuration | Laser source/model, rated power, scanner, lens, marking field and software |
| Marking parameters | Speed, power setting, frequency, pulse width where applicable, line spacing and passes |
| Mark quality | Contrast, depth if required, smallest feature and visible defects |
| Code inspection | Reader/verifier used, number tested, no-reads and grade if specified |
| Cycle time | Marking time and total cycle time recorded separately |
| Repeatability | Sample count, mark-position variation and quality variation |
| Acceptance | Pass/fail criteria, operator, date and approved configuration |
This record makes the result traceable. It also prevents a supplier from comparing one machine’s laser-on time with another machine’s complete production cycle.
Frequently Asked Questions
What is the fastest industrial laser marking machine?
There is no single fastest machine for every application. The result depends on laser power and pulse characteristics, scanner, lens, marking field, material, artwork, required quality and automation. Compare the total cycle time and accepted output on your actual workpiece.
Is 30W enough for high-speed production?
It can be enough for many routine metal-marking jobs, including serial numbers, logos and codes, if the tested cycle time meets the line target. If the mark is large, requires many passes or the production target is demanding, compare 50W or a different process using the same acceptance criteria.
Will a 50W machine be 50% faster than a 30W machine?
Not necessarily. Rated power alone does not determine cycle time. The difference depends on material response, mark depth, artwork, scan path, parameter settings, number of passes and handling time. Run a controlled comparison before calculating the return on investment.
Can a fiber laser mark while a conveyor is moving?
Yes, if the system is designed for mark-on-the-fly operation and correctly tracks product movement. Confirm conveyor speed, encoder or tracking method, trigger timing, product spacing, marking content and code readability during a line trial.
Do I need a vision system?
Not always. A stable fixture may be sufficient when every part arrives in the same position. Vision becomes more useful when orientation or position varies, the mark must follow a feature, or the process needs automatic inspection. Confirm the image-processing time and acceptance criteria as part of the total cycle.
What information should I send for a production quotation?
Send photos and dimensions of the workpiece, material and surface finish, actual marking file, required cycle time, daily output, mark-quality criteria, data interface, positioning method and inspection requirements. Include a sample if practical.
Can JQ Laser customize a production marking system?
Configuration options can include fixtures, rotary axes, conveyors, sensors, PLC integration and optional vision, depending on the application. The feasible design and final specification should be confirmed after reviewing the workpiece, process sequence and line interface.
Why Discuss Your Production Process with JQ Laser?
JQ Laser supplies fiber laser marking machines in common 20W, 30W, 50W and 100W configurations, along with automatic marking options. Depending on the workpiece and production process, a solution may include a suitable lens, fixture, rotary axis, conveyor, sensor, PLC interface or vision system.
We recommend confirming the real workpiece, marking result and cycle-time target before finalizing the configuration. That gives both sides a clearer basis for the quotation, acceptance test and production handover.
To request a recommendation, send:
- Your material and surface finish.
- A photo or drawing of the part.
- The actual text, logo or code to be marked.
- Your required parts per minute or target cycle time.
- Whether the part is stationary or moving on a line.
- Your required inspection method and quality standard.
Related Resources
- Fiber Laser Marking Machine — compare common fiber laser configurations.
- 20W Fiber Laser Marking Machine — evaluate routine identification marking.
- 30W Fiber Laser Marking Machine — review a general-purpose production option.
- 50W Fiber Laser Marking Machine — consider when cycle time or engraving depth justifies more power.
- 100W Fiber Laser Marking Machine — evaluate higher-power material removal and demanding applications.
- Automatic Laser Marking Machine — explore conveyor, sensor and automation options.
- Automation Marking Solution — discuss production-line integration.
- After-Sales Support — review support arrangements.
Before publishing, verify that every internal URL is live and points to the intended page.