Quick answer: A 100W fiber laser marking machine is worth considering when your production requires deeper metal engraving, higher material removal, larger marking jobs or more demanding batch processing. It is not automatically the best choice for every industrial part. If you only need a small serial number or a simple QR code, a 20W, 30W or 50W machine may already do the job at a lower investment.
When we discuss a 100W machine with industrial buyers, we usually start with three questions: What material are you marking? How deep or how visible must the mark be? How many seconds can the marking process take per part?
Those answers determine the laser source, pulse characteristics, lens, marking field, fixture and safety configuration. This guide explains seven practical applications, the setup issues that commonly affect results, and what to check before approving a purchase.
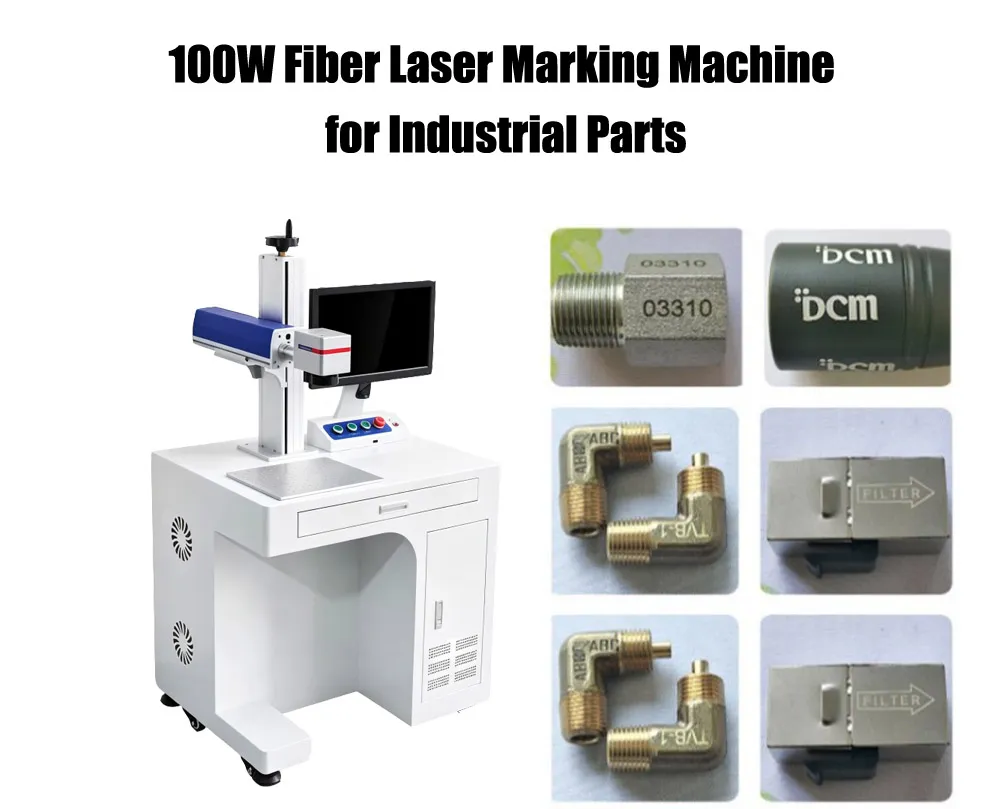
Table of Contents
1. Is a 100W Fiber Laser the Right Choice for Your Industrial Parts?
Choose 100W when the process genuinely needs more laser output. Typical reasons include removing more material, engraving deeper identification marks, processing a larger amount of content or reducing the laser portion of a production cycle.
However, laser power is only one part of the process. A 100W source cannot compensate for an unsuitable lens, poor focus, an unstable fixture, an incorrect pulse setting or a part that moves during marking.
| Your production requirement | What to evaluate | Why it matters |
|---|---|---|
| Deep engraving on steel or tooling parts | 100W source, pulse energy, frequency, focus and multi-pass strategy | Material removal rate and depth consistency matter more than headline speed |
| Permanent part numbers and traceability codes | 100W versus 50W sample test, code size, contrast and inspection | A readable and repeatable code is more important than maximum power |
| Large nameplates or industrial panels | F-theta lens, marking field, working distance and fixture | The whole design must fit the usable field with acceptable detail |
| High-volume production | Actual cycle time, handling, loading and unloading | The laser may not be the bottleneck in the complete process |
| Black or color marking on stainless steel | MOPA source and adjustable pulse parameters | Surface appearance depends on pulse conditions and material finish |
Our practical advice: compare 50W and 100W on the same material, with the same artwork, required depth and inspection method. Record the processing time and the final result. If 100W does not provide a meaningful production benefit, you may not need to pay for the extra power.
2. Seven Industrial Applications for a 100W Fiber Laser Marking Machine
Use Case 1: Deep Engraving on Moulds and Dies
Moulds and dies often need permanent cavity numbers, tool IDs, maintenance references, logos and identification marks. These marks may need to remain visible after repeated handling, cleaning or certain downstream operations.
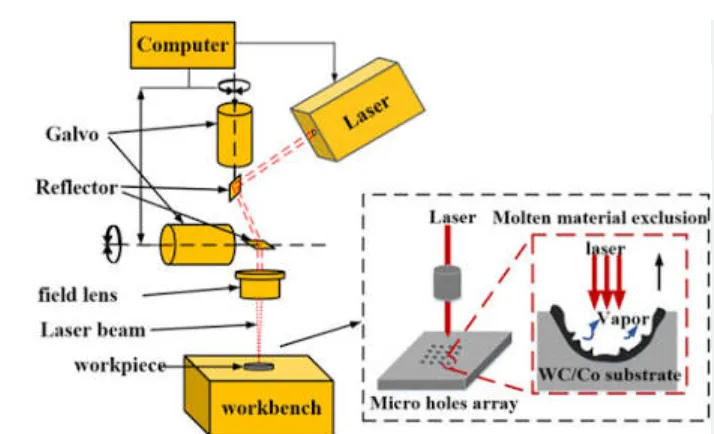
A 100W fiber laser can be evaluated for deeper engraving on suitable tool steels and mould materials. Compared with a light surface mark, deep engraving requires controlled material removal. The process may involve multiple passes, different hatch strategies and periodic cleaning of debris.
Recommended setup to evaluate:
- 100W fiber source with confirmed pulse characteristics.
- A lens selected for the size of the engraving area and required detail.
- A rigid fixture that prevents the mould from moving.
- Adjustable Z-axis or a suitable height-adjustment arrangement.
- Fume and particle extraction suitable for the material being processed.
What to test: engrave a representative cavity number or identification mark to the customer’s specified depth. Measure the depth at several points, check edge quality and inspect whether debris or redeposition affects the final surface.
Important limitation: do not promise a fixed engraving depth based on wattage alone. Tool steel grade, hardness, surface condition, pulse energy, focus, frequency and the number of passes all affect the result. If the mould has a deep cavity or difficult geometry, a conventional 2D galvo system may not reach every surface without a different fixture or 3D processing arrangement.
Use Case 2: Automotive and Machinery Components
Automotive and machinery suppliers may need to mark engine components, transmission parts, brackets, shafts, housings, metal fittings and machined parts. Common marking content includes part numbers, serial numbers, batch references, logos and 2D traceability codes.
The real production challenge is not simply putting a code on a metal surface. The code must be placed consistently, remain readable and match the correct physical part.
Recommended setup to evaluate:
- 100W fiber laser when the required depth or cycle time justifies it.
- Dedicated nests or clamps for parts with irregular shapes.
- Rotary axis for suitable cylindrical parts, if required.
- Barcode or Data Matrix inspection where customer specifications require it.
- PLC or data interface when each part receives a unique code.
What to test: use the actual part and production code. Check marking position, code readability, surface damage and repeatability across multiple parts. If the customer specifies a direct-part-marking verification standard, use the required verifier and grading method.
Important limitation: a code that scans with one handheld reader is not automatically compliant with every automotive traceability requirement. Confirm the customer’s code format, dimensions, location and verification criteria before machine acceptance.
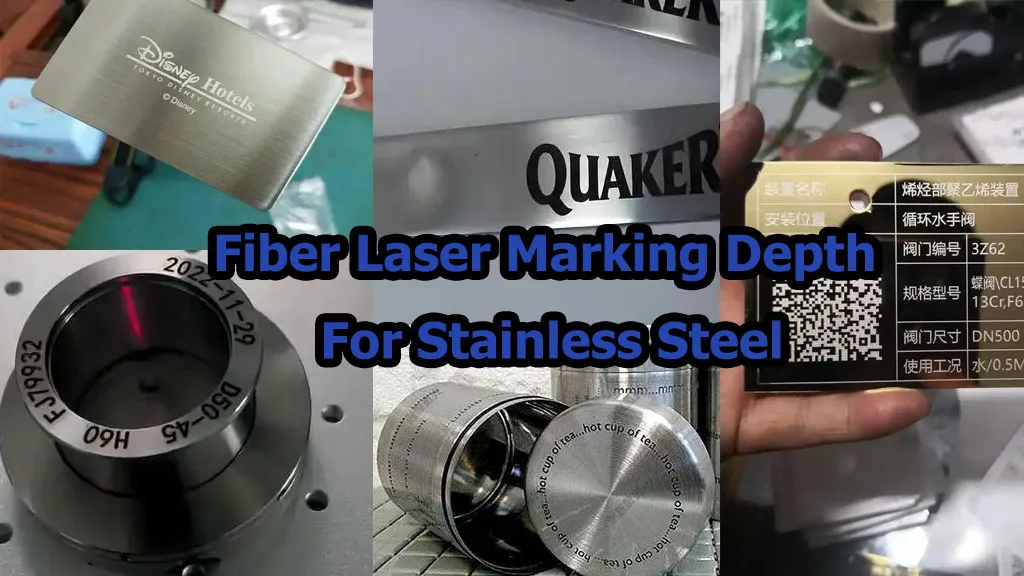
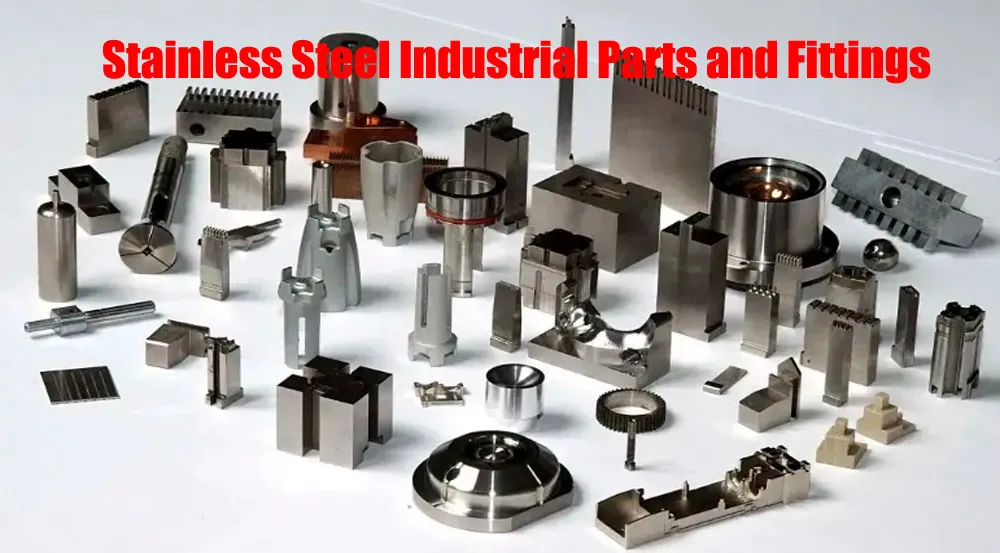
Use Case 3: Stainless Steel Industrial Parts and Fittings
Stainless steel parts are common in valves, pumps, pipe fittings, industrial equipment, food-processing machinery and fabricated components. Buyers may require serial numbers, flow-direction marks, logos, specifications or permanent identification.
A 100W source can provide more processing capacity for selected engraving and material-removal jobs. For ordinary surface identification, however, a lower-power machine may be sufficient.
Recommended setup to evaluate:
- 100W fiber source for demanding engraving or higher-volume work.
- MOPA source if adjustable pulse width is needed for a specific surface result.
- Suitable F-theta lens for the required mark dimensions.
- Fixtures that hold curved or irregular fittings in a repeatable position.
What to test: compare the required contrast, engraving depth and surface finish on the actual stainless steel grade. Test both the polished and brushed finishes if both are used in production.
Important limitation: MOPA does not guarantee a particular black or color result. Stainless steel composition, surface finish, cleaning, pulse width, frequency, speed and focus all influence the appearance. Approve the process from actual samples, not a photograph of another machine’s result.
Use Case 4: Aluminium Housings, Panels and Nameplates
Industrial electrical enclosures, control panels, aluminium housings and metal nameplates often require logos, model numbers, electrical specifications, serial numbers and QR codes.
For anodized aluminium, many identification jobs are based on changing or removing the surface layer to create contrast. For bare aluminium, the process may need a different parameter strategy.
Recommended setup to evaluate:
- 100W source if the panel size, content or cycle time justifies the capacity.
- Lens selected to cover the complete panel without sacrificing required detail.
- Flat support table to prevent thin panels from bending.
- Mechanical locating pins or a fixture for repeatable positioning.
What to test: mark the actual anodized or bare aluminium. Check whether the coating is damaged beyond the required area, whether the contrast is uniform and whether small text remains readable.
Important limitation: a large marking field is not automatically the best choice for fine text. Larger lenses can change the focused spot size and marking detail. Confirm the actual lens and optical configuration rather than selecting a field size from the product brochure alone.
Use Case 5: Cutting Tools, Carbide Tools and Industrial Hardware
Cutting tools, drills, inserts, dies, measuring tools and industrial hardware often require tool numbers, grades, logos, batch references and other identification.
Some applications only need a compact surface mark. Others require deeper engraving that remains identifiable after handling or use. The process should be selected according to the tool material and the required mark durability.
Recommended setup to evaluate:
- 100W fiber laser for selected deep engraving or high-volume marking applications.
- Small-field lens when the mark is compact and fine detail is important.
- Custom tool holder to prevent round tools from rolling.
- Rotary axis if the tool needs to be marked around its circumference.
What to test: mark the actual carbide or tool steel grade, then inspect character edges, depth, position and readability. If the part has a coating, confirm whether the customer wants to mark the coating or remove it to expose the substrate.
Important limitation: some very hard or coated materials need a specific process window. Do not assume that increasing power alone will produce a cleaner mark. Excessive energy can create rough edges, unwanted thermal effects or damage to a coating that should remain intact.
Use Case 6: Copper, Brass and Other Reflective Metal Components
Copper and brass are used in electrical connectors, terminals, fittings, busbars and industrial components. These materials can present different processing challenges from ordinary steel.
A 100W fiber laser may be worth evaluating when the job requires more processing capacity, but reflectivity and thermal behavior must be considered. The source should have suitable protection against back-reflected laser energy where the application requires it.
Recommended setup to evaluate:
- Confirm the source’s back-reflection protection and material compatibility.
- Test the actual alloy, surface finish and component geometry.
- Use a rigid fixture to maintain the focal position.
- Check whether the required mark is surface identification or material removal.
What to test: compare contrast, edge quality, heat effects and repeatability across multiple samples. For electrical parts, check that the marking process does not affect critical contact surfaces or functional dimensions.
Important limitation: do not use a generic steel marking parameter on copper or brass without testing. Alloy composition, reflectivity, thickness and geometry can change the result.
Use Case 7: Large Industrial Parts and Equipment Identification
Large machinery parts, pump housings, structural components, industrial panels and equipment frames may need identification marks in areas that are difficult to reach with a small desktop marking machine.
A 100W laser can be configured with different marking fields, mounting structures, extended Z-axis arrangements or automation options. For oversized parts, the mechanical installation can matter as much as the laser itself.
Recommended setup to evaluate:
- 100W fiber laser if the marking process requires its power level.
- Lens and marking field selected for the actual mark dimensions.
- Extended support or custom mounting for large workpieces.
- Portable or integrated structure if the part cannot be moved to the machine.
- Mechanical height adjustment or a suitable focus arrangement.
What to test: confirm the actual working distance, focus range, access to the marking surface and positioning accuracy at the required location. Test on the real part or a dimensionally representative fixture.
Important limitation: a larger marking field does not mean the machine can mark an unlimited area in one pass. If the mark exceeds the optical field, multiple setups or a motion system may be needed. Large workpieces may also require additional guarding and a different safety arrangement.
3. 100W Fiber Laser Marking Machine: Technical Parameters to Check
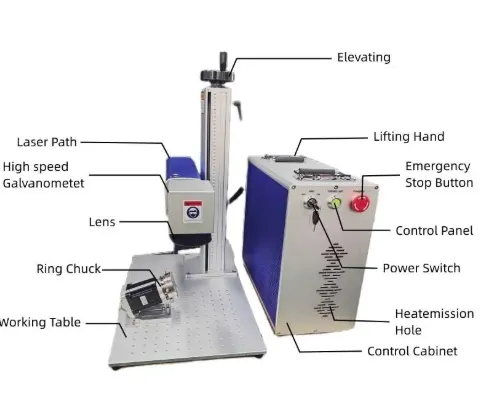
JQ Laser’s published fiber laser series lists 20W, 30W, 50W and 100W power options. The product family references a typical 1064 nm wavelength, air cooling, a 110 × 110 mm standard marking field and optional larger fields. The final configuration depends on the selected source, scanner, lens and machine structure.
For a 100W project, the buyer should ask for the exact laser source model and its original datasheet. A machine described as “100W fiber laser” may use a conventional Q-switched source or a MOPA source. Their pulse characteristics are not interchangeable.
JQ Laser Series Reference Parameters
| Parameter | Published series reference | What must be confirmed on the quotation |
|---|---|---|
| Laser power | 100W option within the 20W / 30W / 50W / 100W fiber series | Exact source model and rated output power |
| Laser type | Pulsed fiber laser; source architecture depends on the selected model | Conventional Q-switched or MOPA |
| Wavelength | 1064 nm typical for the fiber series | Exact source datasheet |
| Cooling | Air cooling is common in the published series | Confirm the selected source’s cooling requirements and ambient limits |
| Standard marking field | 110 × 110 mm typical | Actual F-theta lens and usable field |
| Optional marking fields | 150 × 150, 175 × 175, 200 × 200 and 300 × 300 mm options are listed for the series | Confirm which lens sizes are available for the selected 100W source and scanner |
| Scanner speed | Up to approximately 7,000 mm/s is referenced on the series page | Actual marking speed for the required artwork and material |
| Control system | BJJCZ / JCZ-compatible systems are commonly used in the series | Controller model, software version and supported interfaces |
| Power supply | 110V / 220V, 50/60Hz depending on destination configuration | Input voltage, current, grounding and total machine power requirement |
Important: these are series-level references, not a complete certified datasheet for every JQ 100W configuration. Confirm the exact source, scanner, lens, controller and electrical requirements in the final quotation.
Example: What a Published 100W MOPA Source Specification Looks Like
To show why the exact source model matters, the JPT YDFLP-100-M7-M-R is a published 100W MOPA source with the following source-level specifications:
| JPT M7 source parameter | Published value | What it means for the buyer |
|---|---|---|
| Architecture | MOPA | Master oscillator power amplifier architecture |
| Nominal average output power | Greater than 100W | Source-level rated output specification |
| Central wavelength | 1064 nm | Typical fiber laser wavelength for metal marking |
| Pulse repetition rate | 1 to 4000 kHz | Adjustable pulse frequency range |
| Pulse duration | 2 to 500 ns | Adjustable pulse-width range for this specific source |
| Maximum pulse energy | 1.5 mJ | Source-specific pulse-energy specification |
| Beam quality | M² less than 1.4 | Published beam-quality specification |
| Cooling | Air-cooled | Cooling arrangement for this source model |
This JPT specification is an example of one 100W MOPA source. It should not be assumed to describe every 100W source or every JQ Laser machine. Ask for the original datasheet and source nameplate for the configuration being purchased.
Why Scanner Speed Is Not the Same as Production Output
A scanner speed of 7,000 mm/s describes a scanner specification under defined conditions. It does not mean that every part can be marked at that speed or that a factory can produce a fixed number of parts per hour.
Actual production time depends on:
- Number of characters, lines, hatch paths and graphic details.
- Required engraving depth and number of passes.
- Material grade, surface finish and coating.
- Lens field, focus and scan-head configuration.
- Fixture loading, unloading and positioning time.
- Inspection and handling between processes.
For deep engraving, a machine may need multiple passes and cleaning between passes. In that situation, the useful comparison is accepted parts per hour at the required depth, not the maximum scanner speed printed in a brochure.
4. Seven Setup Checks Before You Put a 100W Machine into Production
Check 1: Confirm the Exact Laser Source
Do not accept “100W fiber laser” as the complete source specification. Ask whether it is a conventional Q-switched source or MOPA, and request the exact manufacturer and model.
Check the average output power, pulse energy, pulse frequency, pulse duration, beam quality, cooling requirements and back-reflection protection where relevant.
Why it matters: two sources with the same nominal power can have different pulse behavior and may produce different results on the same material.
Check 2: Select the Lens for the Actual Marking Area
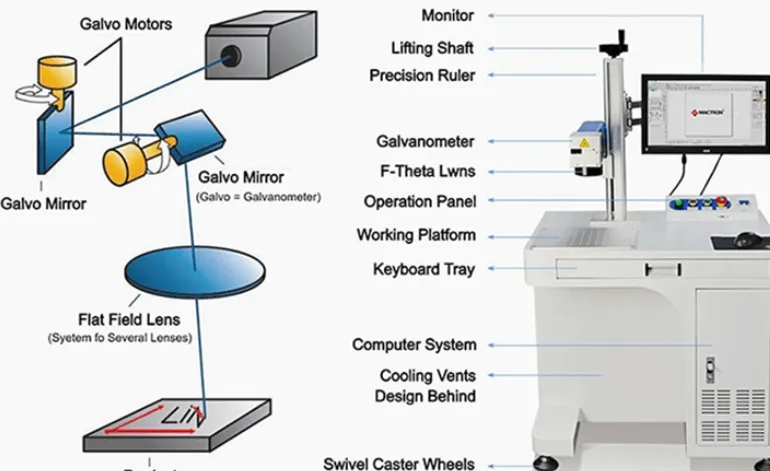
The F-theta lens determines the marking field and influences the focused spot size. A 110 × 110 mm field may be appropriate for compact parts, while a larger field may help with wide nameplates or larger components.
But a larger field is not automatically better. The focused spot and achievable detail can change with the lens design and optical setup.
Setup method: mark the smallest required text, the longest code and the largest graphic using the proposed lens. Check edge quality and dimensions across the whole field, not only at its center.
Check 3: Make the Workpiece Stable
Industrial parts are rarely all flat and identical. A part may rock, rotate or sit at a different height each time it is loaded.
Use a dedicated fixture, locating pins, clamps or a custom nest when repeatable positioning is important. For cylindrical parts, evaluate a rotary axis or a purpose-built holder.
Setup method: load and unload the same part repeatedly. Measure whether the mark returns to the required location. Repeat the test with the dimensional variation expected in normal production.
Check 4: Set Focus and Z-Axis Height Correctly
Incorrect focus can affect line width, edge quality, energy density and marking consistency. If your parts have different heights, a fixed worktable may not be enough.
Use a manual or motorized Z-axis, height gauge or other suitable focus arrangement. For irregular surfaces, determine whether the process needs a height sensor or a different optical setup.
Setup method: test the minimum and maximum part heights. Confirm the focal position and the resulting mark quality at both limits.
Check 5: Build a Repeatable Parameter Recipe
Do not rely on one operator remembering the settings. Record the source model, power, frequency, pulse width if adjustable, speed, hatch spacing, number of passes, focus position and lens.
For deep engraving, record the depth after a defined number of passes. For identification marking, record the required contrast and inspection result.
Setup method: create a controlled test matrix. Change one or two variables at a time, then record the result. This makes it easier to reproduce the approved process after a shift change or maintenance event.
Check 6: Plan Extraction and Laser Safety
Laser marking can produce fumes and particles, especially when removing coatings or engraving deeply. Extraction should be designed for the material and process, not selected only by the size of the machine.
Confirm the laser safety classification and the guarding required for the complete installation. Depending on the application and local requirements, the machine may need an enclosure, interlocks, emergency stops, warning indicators and suitable beam containment.
Setup method: review the machine risk assessment, guarding design, interlock operation and extraction performance before production. Do not bypass safety interlocks to increase access or convenience.
Check 7: Validate the Complete Production Cycle
A successful single-part demonstration is not enough for an industrial production machine. Run a batch using the actual product, fixture, marking file and inspection method.
Record the total cycle time, accepted quantity, rejected quantity, mark consistency, operator handling time and any process interruptions.
Setup method: run the machine long enough to expose repeatability issues. Test normal operation as well as expected changes in product size, material batch or operator loading.
5. How to Test a 100W Fiber Laser Before Buying
Before confirming the machine, send the supplier actual workpieces. If you have several materials or surface finishes, send representative samples of each one.
Step 1: Define the Required Result
- Is the mark for identification, branding or deep engraving?
- What is the required width, height and location?
- Does the customer require a specific depth?
- Does the mark need to survive cleaning, handling, coating or another downstream process?
- Does a QR code or Data Matrix code need to meet a defined verification grade?
Step 2: Test the Actual Material
Use the same material grade and surface finish as production. If the parts are plated, anodized, polished, brushed or coated, include those actual conditions in the test.
Step 3: Compare 50W and 100W Where Practical
If you are unsure whether 100W is worth the extra cost, ask for a controlled comparison. Keep the required mark, material and acceptance criteria the same.
Compare:
- Time to achieve the required mark.
- Engraving depth and uniformity.
- Edge quality and surface finish.
- Heat effects or coating damage.
- Readability and inspection results.
- Accepted parts per hour under the same handling conditions.
Step 4: Record the Test Conditions
Ask the supplier to record the laser source model, lens, power, frequency, pulse width if adjustable, marking speed, hatch spacing, number of passes, focus position and measured result.
Step 5: Approve a Written Acceptance Sample
Keep an approved sample and test record. The sample should show the required appearance, location, depth or code quality. Use it as a reference during factory acceptance and later production checks.
Do not approve a machine based only on a video of a different part. A video can show that a machine is operating, but it cannot prove that your material, mark dimensions and production target will be achieved.
6. Procurement Checklist: 10 Items to Confirm Before Ordering
Use the following checklist when reviewing a quotation for a 100W industrial fiber laser marking machine. Each item includes the operating conditions where it matters, the evidence or test method to request, and the limitation you should understand.
| Purchase item | Applicable operating conditions | Evidence or test method | Limitations and risks |
|---|---|---|---|
| 1. Laser source model and architecture | Every 100W purchase, especially when the process needs deep engraving or a specific surface effect | Request the original manufacturer datasheet, model number and source nameplate | Nominal power alone does not define pulse behavior or application performance |
| 2. Pulse energy, frequency and pulse width | Deep engraving, material removal, stainless steel surface effects and applications sensitive to heat input | Compare the source’s published pulse specifications and run an actual material test | Available pulse ranges vary by source model; MOPA and Q-switched specifications are not interchangeable |
| 3. F-theta lens and marking field | Large nameplates, detailed codes, wide panels or parts requiring different marking areas | Request the lens model and test the smallest text and largest artwork across the field | A larger field may change spot size and detail; the usable field depends on the optical configuration |
| 4. Scanner and controller | Production jobs with many characters, complex artwork or integration requirements | Confirm scanner model, controller model, software version and supported file formats | Maximum scanner speed does not equal actual processing speed or production output |
| 5. Fixture and worktable | Irregular parts, cylindrical components, repeatable production and multi-product jobs | Load and unload the actual part repeatedly; measure marking position variation | A universal table may not hold every part securely; custom fixtures may add cost and setup time |
| 6. Z-axis and focus arrangement | Parts with different heights, large workpieces or changing marking positions | Test focus and mark quality at the minimum and maximum workpiece heights | A motorized Z-axis does not automatically provide automatic focus correction on irregular surfaces |
| 7. Marking depth and cycle time | Deep engraving, batch marking and high-volume production | Measure depth and total cycle time on actual samples; compare accepted parts per hour | Depth and speed depend on material, geometry, focus, pulse settings and number of passes |
| 8. Software and variable data | Serial numbers, batch numbers, QR codes, Data Matrix codes and traceability work | Test the actual data source, numbering sequence, duplicate prevention and communication failure handling | Basic marking software may not provide full production database or traceability management |
| 9. Safety and extraction | All industrial installations, especially deep engraving and coating removal | Review laser classification, enclosure, interlocks, emergency stops and extraction arrangement | Requirements depend on the complete machine, material, process and local regulations |
| 10. Acceptance test and after-sales support | Every machine, particularly customized systems or production-critical applications | Agree on sample acceptance criteria, training, warranty terms, spare parts and support response process | A short factory demonstration may not represent long-run production conditions |
Questions to Put in Your Purchase Specification
- Which exact 100W laser source model is included?
- Is the source MOPA or conventional Q-switched?
- Which scanner and F-theta lens are included?
- What is the actual usable marking field?
- What are the required marking depth, contrast and code quality?
- What sample material and marking file were used for the quotation?
- What cycle time was measured, and under which conditions?
- Are fixtures, rotary devices, extraction and safety guarding included?
- What software, controller and data functions are included?
- What are the written acceptance criteria and support terms?
7. Comparison Table: 20W, 30W, 50W and 100W Fiber Laser Marking Machines
Higher power is useful when the process needs more output or material removal. It is not automatically the best choice for small identification marks.
| Power | Typical jobs to evaluate | When to consider it | What to check before upgrading |
|---|---|---|---|
| 20W | Serial numbers, simple logos, nameplates and selected QR codes | When the mark is relatively simple and the required cycle time is achievable | Contrast, readability and whether the machine meets the required output |
| 30W | General metal marking and batch identification | When a little more processing capacity is needed without moving to a higher power class | Actual cycle-time improvement over 20W |
| 50W | More demanding batch work, selected engraving and faster metal processing | When the sample test shows that 20W or 30W is limiting the process | Required depth, material removal rate and heat effects |
| 100W | Deep engraving, demanding metal removal and selected high-volume industrial jobs | When the required process benefits from the additional output and the full system can support it | Source architecture, pulse energy, lens, fixture, cooling and actual accepted output |
100W Fiber Laser vs. 100W MOPA Fiber Laser
| Comparison point | Conventional pulsed fiber source | MOPA fiber source |
|---|---|---|
| Pulse control | Typically has a more fixed pulse-width characteristic for the selected source | Allows adjustable pulse width on compatible models |
| Typical evaluation | General metal marking and selected engraving processes | Applications that benefit from pulse adjustment, including selected stainless steel surface effects |
| Color marking | Not generally selected for flexible color-marking experiments | Can be evaluated for selected color-marking processes on stainless steel or titanium |
| Deep engraving | Can be suitable when source pulse characteristics and process settings match the job | Can also be used for deep engraving, depending on the source and process |
| Purchase decision | Often worth evaluating for straightforward industrial marking and engraving | Worth the additional cost only when adjustable pulse control provides a real process benefit |
Do not buy MOPA simply because it sounds more advanced. If your parts only need a standard serial number and a conventional source passes the test, the simpler configuration may be the better investment.
8. What Affects the Total Cost of a 100W Industrial Fiber Laser?
The purchase price of a 100W fiber laser marking machine depends on more than the laser source. Two machines with the same nominal power can have very different configurations.
- Laser source: manufacturer, exact model, architecture and warranty.
- Scanner: brand, model, aperture and performance requirements.
- F-theta lens: marking field, focal length and optical quality.
- Controller and software: control board, software version and data functions.
- Machine structure: worktable, enclosure, Z-axis and mounting design.
- Automation: rotary axis, conveyor, PLC, sensors and vision functions.
- Safety: guarding, interlocks, extraction and installation requirements.
- Delivery: packing, shipping, customs arrangements and destination requirements.
For an industrial buyer, the better comparison is total cost to achieve the required production result. A lower-priced machine may require additional fixtures, safety equipment or integration work. A more expensive machine may be unnecessary if your process is straightforward.
Ask for a quotation that separates the standard machine from optional accessories and automation. That makes it easier to compare suppliers fairly.
9. How JQ Laser Approaches a 100W Industrial Marking Project
At JQ Laser, we recommend starting with the workpiece and the marking requirement rather than choosing a power rating first.
First, Understand the Material and Surface
We need to know whether the part is stainless steel, carbon steel, aluminium, brass, copper, carbide or another material. Surface treatment also matters. Send a real sample if the material has plating, anodizing, coating, polishing or a special finish.
Then, Confirm What the Mark Must Achieve
Tell us whether the job needs surface identification, a high-contrast mark, a specific engraving depth, a QR code or a decorative result. If the customer has a written specification, share it before the sample test.
Choose the Source and Optical Configuration
We can evaluate 100W source options, including conventional fiber and MOPA configurations where available. The scanner and lens should match the required marking field, detail and production conditions.
Check the Fixture and Production Layout
If the part is irregular, cylindrical or heavy, the fixture and worktable must be designed around it. A stable part position is essential for repeatable marking.
Test and Record the Result
We recommend keeping the actual sample, marking file, source model, lens, parameter settings and inspection result together. This gives both sides a reference for the final machine configuration and acceptance process.
We would rather confirm that a 50W machine can do the job than recommend 100W when it does not provide a meaningful benefit. The right machine is the one that meets your actual production requirement with a suitable total cost.
10. Frequently Asked Questions About 100W Fiber Laser Marking Machines
What materials can a 100W fiber laser marking machine process?
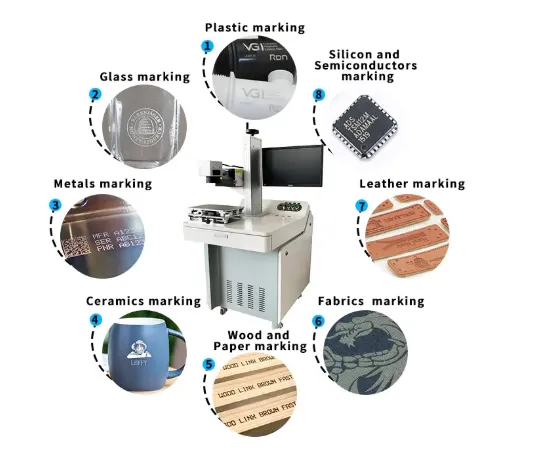
Fiber lasers are commonly used for suitable metals such as stainless steel, carbon steel, aluminium, brass, copper, titanium and carbide. The result depends on the alloy, surface finish, coating, source and marking process. Some plastics can also be marked, but the exact material must be tested.
Is 100W enough for deep engraving on stainless steel?
It can be suitable for selected deep-engraving applications. The achievable depth and processing time depend on the stainless steel grade, required depth, pulse characteristics, focus, frequency, hatch spacing and number of passes. Request a measured sample rather than relying on a general depth claim.
Is a 100W fiber laser always faster than a 50W machine?
Not in every application. A 100W source has a higher nominal output, which can improve some marking and engraving processes. But the actual improvement depends on the process settings, scanner, lens, artwork, material and handling time. Compare the same job on both machines.
Should I choose a 100W MOPA fiber laser or a conventional 100W fiber laser?
Choose MOPA when adjustable pulse width provides a real benefit for your application, such as selected stainless steel surface effects or specific process control. A conventional source may be more economical for straightforward metal marking and engraving. Test both if the surface result is critical.
Can a 100W fiber laser mark QR codes and Data Matrix codes?
Yes, when the material and surface allow a readable mark. The code dimensions, module size, contrast, focus and positioning must be controlled. If the customer requires a specific code-quality grade, use the required verifier during the sample test.
Can a 100W fiber laser mark large industrial parts?
Yes, with a suitable lens, worktable, fixture or customized mounting arrangement. The marking field is determined by the optical configuration. For parts larger than the available field, multiple setups or a motion system may be required.
Does a 100W fiber laser marking machine need water cooling?
Some 100W pulsed fiber sources are air-cooled, while cooling requirements depend on the exact source model and machine design. Check the original source datasheet and the complete machine’s environmental requirements before installation.
Can the machine run continuously in a factory?
It can be configured for industrial production, but continuous operation depends on the source, machine cooling, ambient temperature, extraction, electrical supply, duty cycle and maintenance. Validate the intended shift pattern during the acceptance test.
What marking field should I choose?
Choose the smallest field that comfortably covers the required artwork and positioning tolerance, unless your application requires a larger area. A larger field can affect the focused spot and detail. Test the smallest text and code using the actual proposed lens.
What should I send JQ Laser for a 100W quotation?
Send the material, part photos or samples, dimensions, surface finish, marking content, required depth or contrast, expected daily output, lens or marking area requirement, and any inspection or automation requirements. A short video of the current process can also help us understand the production problem.
11. Request a 100W Fiber Laser Sample Test
If you are considering a 100W fiber laser marking machine for industrial parts, send us your workpiece and marking requirement. We can help evaluate whether 100W is necessary, which source architecture is suitable and what lens or fixture should be included.
To make the evaluation useful, please provide:
- Material grade and surface finish.
- Part photos, drawings or physical samples.
- Marking content and required mark dimensions.
- Required engraving depth, if applicable.
- Required contrast or code-verification standard.
- Expected production volume and target cycle time.
- Available installation space and electrical supply.
- Any fixture, rotary, PLC or vision requirements.
Contact JQ Laser for a 100W Fiber Laser Marking Solution
You can also review our fiber laser marking machine series, deep engraving laser machine and laser marking automation solutions.
Technical References and Further Reading
The following sources support the technical discussion in this article. Source-level specifications and third-party machine specifications are identified as examples; they should not be interpreted as guaranteed specifications for every JQ Laser configuration.
- JQ Laser: Fiber Laser Marking Machine – JQ Laser’s published fiber laser series, including power options, wavelength, marking-field references and configuration notes.
- JPT: 100W MOPA Fiber Laser – Published source-level specifications for the YDFLP-100-M7-M-R, including pulse frequency, pulse duration, pulse energy and beam quality.
- IPG Photonics: Application Note #12, Deep Engraving with Fiber Lasers – Explains laser material removal and how frequency, pulse overlap, peak power, average power, depth and surface roughness affect engraving.
- AMADA WELD TECH: LM-F100A Fiber Laser Markers – Industrial fiber laser marking applications and process capabilities, including marking, engraving, etching, ablation and annealing.
- LaserStar: FiberCube 3400 Series Data Sheet – Example of an industrial 60W / 100W MOPA fiber marking and engraving platform.
- WISELY: 100W MOPA JPT Fiber Laser Marking Machine – A third-party machine configuration example showing a 100W / 120W source, marking field options and related machine parameters.