Bottom line: A 20W fiber laser marking machine can be a practical choice for stainless steel nameplates, serial numbers, logos, QR codes and many general identification jobs. But don’t choose a machine by the 20W label alone. The laser source, scanner, field lens, fixture, software and safety setup all affect what you can actually produce.
If you mainly mark serial numbers, logos and ordinary identification information on 304 stainless steel, a conventional 20W pulsed fiber laser is a sensible starting point. If you need more flexibility when developing black marks or specific surface effects, compare a 20W MOPA configuration as well.
My advice is to compare the complete machine configuration and ask the supplier to mark your actual stainless steel parts before you make a decision. A machine that produces a good sample on a flat coupon may still be unsuitable for your production parts, especially if they are curved, polished, small or difficult to fixture.
This guide explains five configuration choices, typical applications, equipment specifications, buyer checks and the questions worth asking before ordering.
What Can a 20W Fiber Laser Mark on Stainless Steel?
A 20W pulsed fiber laser operates around the 1064 nm wavelength and is commonly used for marking metals. Stainless steel is one of the materials buyers frequently test because it can produce several different marking appearances without requiring an ink or label.
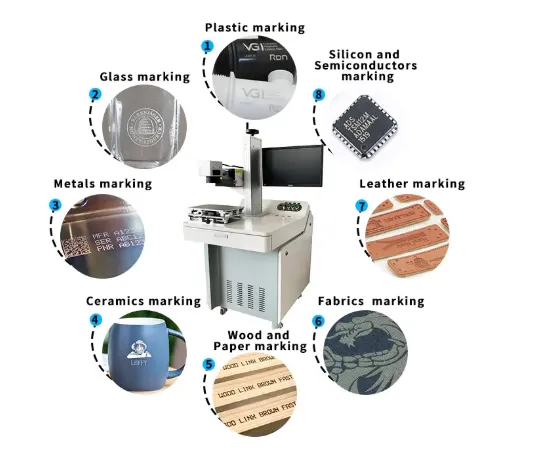
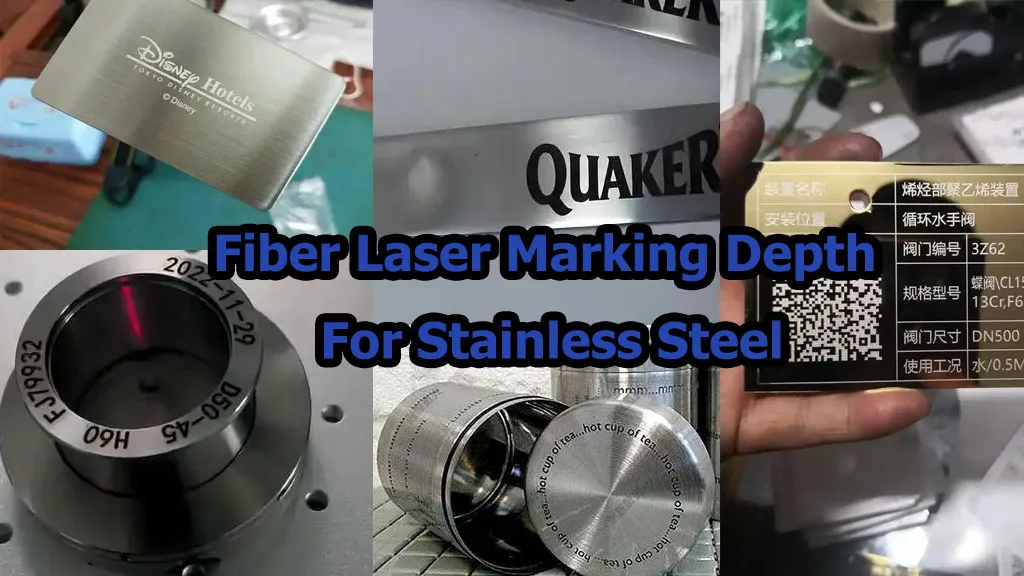
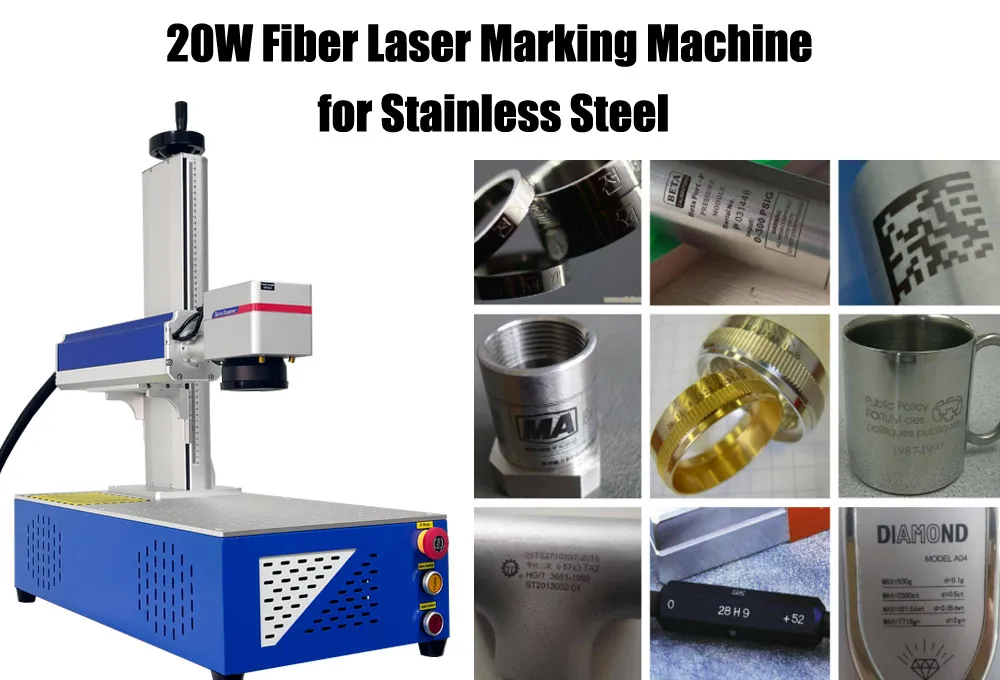
For a 20W system, the most practical applications to evaluate are:
1. Stainless steel nameplates
Mark company logos, model numbers, electrical ratings, serial numbers and product information on flat stainless steel nameplates.
What matters: small text readability, consistent contrast, correct lens selection and repeatable positioning.
2. 304 stainless steel equipment parts
Mark part numbers, production batch IDs, maintenance codes and identification information on machine components and equipment housings.
What matters: the marking position must not interfere with sealing surfaces, precision fits or functional areas. Confirm the marking location against the engineering drawing.
3. Stainless steel tools and hardware
Mark tool IDs, model numbers, logos and traceability information on suitable tools, fixtures, brackets and hardware.
What matters: part geometry, surface condition and whether the mark needs to remain readable after handling, cleaning or finishing.
4. Stainless steel bottles and consumer products
Mark logos, personalized names, product models and decorative patterns on suitable stainless steel bottles, tumblers and kitchenware.
What matters: cylindrical parts normally need a compatible rotary axis or another suitable positioning method. A standard flat marking setup does not automatically provide full-surface cylindrical marking.
5. QR codes and Data Matrix codes
Mark identification and traceability codes on stainless steel components and nameplates.
What matters: code readability must be checked using the intended scanner. If the customer requires formal direct-part-mark verification, scanning a code successfully is not the same as verifying its symbol quality.
What a 20W machine should not be assumed to do
- It is not automatically suitable for every deep-engraving requirement.
- It does not guarantee a uniform black mark on every 304 stainless steel finish.
- It does not guarantee a particular engraving depth in one pass.
- It does not guarantee the same marking speed on every artwork or workpiece.
- It does not automatically meet corrosion-resistance or medical-device marking requirements.
For deeper engraving, high-volume production or demanding surface-removal requirements, compare a higher-power system after testing the actual job. Do not buy more power simply because the number sounds better.
5 Configuration Choices to Compare Before Buying
Two machines can both be advertised as 20W fiber laser markers and still have quite different capabilities. These are the five areas I would check first.
Configuration 1: Conventional Fiber Laser or MOPA Fiber Laser?
This is the first decision because the laser source determines the basic pulse characteristics available to the process.
Conventional pulsed fiber laser
A conventional Q-switched pulsed fiber source is a practical option for many general metal marking applications, including:
- Serial numbers and model numbers.
- Stainless steel nameplates.
- Logos and simple graphics.
- General identification marks.
- Many standard metal engraving jobs.
It is often a good choice when the target is a clear, durable identification mark and the sample test meets the customer’s requirements.
MOPA fiber laser
MOPA sources provide adjustable pulse-width control on supported models. This gives the process engineer additional flexibility when developing a marking process, particularly for selected black or color-related surface effects on stainless steel.
For example, the published JPT YDFLP-E-20-M7-S-R source specification lists:
- Rated average output power: greater than 20W.
- Wavelength: 1064 nm.
- Adjustable pulse width: 2–350 ns.
- Pulse frequency: 1–4000 kHz.
- Maximum pulse energy: 0.8 mJ.
- Beam quality: M² less than 1.4.
- Cooling: air-cooled.
These are source specifications, not a universal stainless steel marking recipe. The actual marking result still depends on speed, pulse frequency, pulse width, hatch spacing, focus, material finish and the optical configuration.
Which one should you choose?
If you mainly need ordinary serial numbers, logos and identification marks, start by testing a conventional fiber configuration. If your customer has a specific black-marking requirement or you need more pulse flexibility, ask for a conventional-versus-MOPA sample comparison.
My purchasing advice: do not pay extra for MOPA without confirming what the additional pulse control achieves on your actual part.
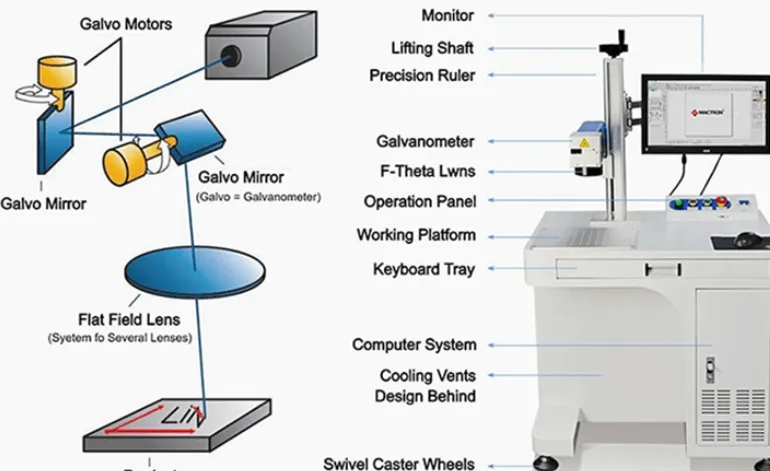
Configuration 2: Galvo Scanner and Field Lens
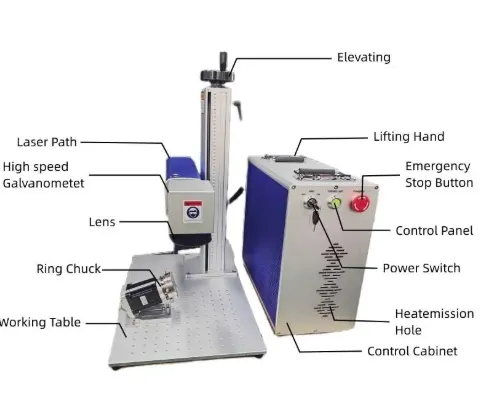
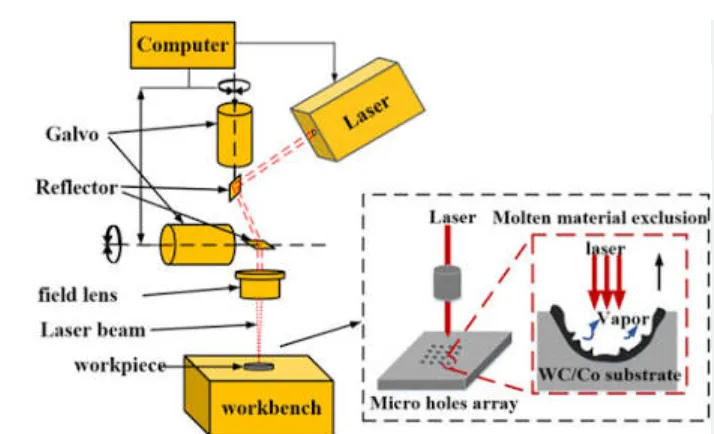
The scanner and field lens determine how the laser beam is positioned and focused over the work area. This affects marking field size, detail capability and working distance.
For many desktop fiber laser marking systems, a 110 × 110 mm field is a common standard configuration. Depending on the scanner and optical setup, other lens fields may be available, such as 70 × 70 mm, 150 × 150 mm, 175 × 175 mm or 200 × 200 mm.
How should you choose the lens?
- 70 × 70 mm: worth evaluating for smaller marking areas and applications where a smaller field is sufficient.
- 110 × 110 mm: a practical starting point for many nameplates, small parts and general identification jobs.
- 150 × 150 mm or 175 × 175 mm: useful candidates for larger nameplates and parts that need more marking area.
- 200 × 200 mm or larger: consider when the part or fixture requires a larger field, but test fine details and edge performance carefully.
A larger lens field is not automatically better. The optical spot size and fine-detail performance can change with the lens and optical configuration.
What should you test?
- Mark the smallest required text at the center of the field.
- Repeat the same test near the field edges.
- Check fine lines, small logos and QR code modules.
- Confirm the actual working distance and focus method.
- Check whether the complete part fits inside the usable marking field.
Important: do not compare machines using only the stated maximum marking area. Ask the supplier to confirm the scanner model, lens model, working distance and actual usable field on the quoted configuration.
Configuration 3: Worktable, Z-Axis and Fixtures
This is where many buyers discover a problem after receiving the machine. The laser can mark the material, but the operator cannot position the part consistently or load it efficiently.
For stainless steel production, consider how the parts are held and positioned.
Flat parts and nameplates
A standard worktable may be sufficient for flat plates and small components. If you mark the same part repeatedly, a locating fixture can reduce positioning variation and make loading easier.
Different part heights
A motorized Z-axis or suitable height-adjustment system can make it easier to handle parts with different heights. It does not remove the need to establish the correct focus position for each setup.
Cylindrical parts
For bottles, tubes and suitable round components, a rotary axis can rotate the workpiece during marking. Confirm the chuck or roller type, part diameter range, available clearance and whether the required artwork can be processed without distortion.
Small components in batches
A multi-part fixture can hold several workpieces in a repeatable arrangement. It may reduce handling time, but only if the fixture allows safe access, correct focus and consistent positioning.
Practical recommendation: send the supplier a photo, drawing and dimensions of your real part. Ask for a fixture proposal and a test using the proposed setup. A fixture designed around the actual part is often more useful than an impressive machine specification.
Configuration 4: Controller, Software and Variable Data
For a workshop that marks only fixed logos and model numbers, basic marking software may be sufficient. If every part needs a different serial number, batch number or QR code, data handling becomes much more important.
Common machine configurations use a JCZ-compatible control system and EZCAD-family software. The exact controller, software version, interface and supported functions should be confirmed in the quotation.
Questions to ask the supplier
- Which controller is installed?
- Which software version is included?
- Can the machine mark variable serial numbers?
- Can it import text or code data from a file?
- Can it generate the barcode or 2D code format required by the customer?
- Is an external database, PLC or production-system connection required?
- Can the operator select jobs without accidentally using the wrong part number?
Do not assume that a machine with standard marking software automatically includes ERP, MES or database integration. These functions may require additional hardware, software development or interface work.
For QR codes and Data Matrix
Test the actual code size, module size, quiet zone, contrast and reading performance with the intended scanner. If the customer requires a formal direct-part-mark quality grade, agree on the applicable verification standard and verifier before production approval.
Configuration 5: Safety Enclosure, Extraction and Electrical Setup
Safety should be part of the machine specification, not an optional discussion after the purchase order.
Fiber laser marking sources commonly operate around 1064 nm. This wavelength is invisible to the human eye, so direct or reflected exposure can present a serious eye hazard.
For an industrial installation, discuss:
- Whether the machine is open-frame or enclosed.
- Whether the enclosure has suitable interlocks.
- Whether viewing windows are rated for the actual laser wavelength and configuration.
- Whether extraction is required for the material and marking process.
- Whether the installation includes emergency-stop and other appropriate safety controls.
- Whether the machine will be installed in a controlled laser work area.
For electrical setup, confirm the destination voltage, frequency, plug type and rated input requirements. A machine configured for one market should not be assumed to be ready for another country’s electrical supply.
My advice: ask for photographs or drawings of the actual enclosure and safety arrangement being quoted. Do not rely on a generic product photo.
20W Fiber Laser Marking Machine Specifications: What Do the Numbers Mean?
The following table shows common specification references for a JQ Laser-style 20W fiber marking system. The final values must be confirmed against the exact source, scanner, lens and machine configuration in the quotation.
| Specification | Configuration reference | What the buyer should understand |
|---|---|---|
| Laser type | Pulsed fiber laser | Confirm whether it is conventional Q-switched or MOPA. |
| Rated laser power | 20W | Rated average output power; not a direct measure of finished-part cycle time. |
| Wavelength | 1064 nm | Typical wavelength for fiber marking of metals. |
| Marking field | 110 × 110 mm standard reference | Optional lens fields depend on the optical setup. |
| Scanner speed | Up to approximately 7,000 mm/s on selected configurations | Scanner capability is not the same as actual production throughput. |
| Cooling | Air-cooled on common configurations | Confirm the source and complete machine cooling requirements. |
| Software | EZCAD-family software on compatible configurations | Confirm controller compatibility, version and data functions. |
| Power supply | 110V or 220V configurations depending on destination | Confirm voltage, frequency, current and plug requirements. |
| Common applications | Metal logos, serial numbers, nameplates and codes | Actual result depends on material, finish and process development. |
Specification note: the approximately 7,000 mm/s figure is a scanner-speed reference used on selected machine configurations. It is not a guaranteed speed for every stainless steel job. The exact 20W laser source may also have its own frequency, pulse-width and pulse-energy specifications. Do not combine values from different source models into one machine specification.
Example: A JPT 20W M7 MOPA source
For buyers comparing a MOPA configuration, the JPT YDFLP-E-20-M7-S-R provides a useful example of the difference between source specifications and complete machine specifications.
| Parameter | Published source specification |
|---|---|
| Source model | YDFLP-E-20-M7-S-R |
| Architecture | MOPA |
| Average output power | >20W |
| Wavelength | 1064 nm |
| Pulse width | 2–350 ns |
| Pulse frequency | 1–4000 kHz |
| Maximum pulse energy | 0.8 mJ |
| Beam quality | M² < 1.4 |
| Cooling | Air-cooled |
This table describes the laser source, not every 20W machine. Scanner, lens, controller, software, enclosure and working area must be specified separately.
How to Test a 20W Fiber Laser Marking Machine Before Buying
Do not approve a machine based on a short video showing one successful mark. Ask the supplier to test your actual material and artwork.
Step 1: Send a representative workpiece
Provide the actual 304 stainless steel part, or at least a coupon with the same material grade and surface finish. If your production parts are polished, do not test only on brushed material.
Step 2: Define the required marking result
Tell the supplier whether you need:
- Dark or black surface marking.
- White or light-contrast marking.
- Shallow surface etching.
- Deeper engraving.
- Small text or fine-line graphics.
- QR codes or Data Matrix codes.
Step 3: Test the proposed configuration
Ask the supplier to identify the laser source, scanner and lens used for the test. Record the settings and do not change several variables at once when comparing samples.
Step 4: Inspect more than appearance
- Is the mark readable under normal inspection lighting?
- Are small characters complete and consistent?
- Are edges clean?
- Is there unwanted discoloration outside the artwork?
- Is material removal acceptable?
- Does the QR code or Data Matrix code read with the intended scanner?
- Does the surface remain acceptable after the required cleaning process?
Step 5: Test repeatability
Mark several parts using the same setup. Check whether the results remain consistent when the operator reloads the workpiece and repeats the job.
Step 6: Record the complete cycle time
Record loading, positioning, focusing, laser-on time, unloading and inspection. This is the number that matters when estimating actual production capacity.
Step 7: Save the approved configuration
Keep the source model, lens, scanner, artwork, material batch, parameter recipe, fixture and sample photographs together. This creates a useful reference for future production and after-sales support.
Purchasing Decision Checklist: 8 Checks Before Ordering
Use the following checklist when comparing quotations from different suppliers. Each item includes when it matters, how to verify it and what it cannot guarantee.
| Check | Applicable conditions | Evidence / test method | Limitations |
|---|---|---|---|
| 1. Laser source type and brand | All stainless steel marking jobs, especially where black marking or deep engraving is required. | Ask for the exact source model and manufacturer datasheet. Compare the actual samples. | A brand name or rated wattage alone does not prove the marking result. |
| 2. Scanner and lens | Small text, large nameplates, QR codes or multiple parts in one fixture. | Confirm scanner model, lens model, working distance and marking field. Test the center and edges. | A larger field may affect spot size and fine-detail capability. |
| 3. Worktable and fixture | Repeated parts, small components, cylindrical products or batch marking. | Send drawings and dimensions. Test the actual fixture and part-loading method. | A standard worktable does not guarantee repeatable positioning for every shape. |
| 4. Controller and software | Variable serial numbers, batch IDs, QR codes and production data workflows. | Run a real job file and test data import, job selection and required code formats. | ERP/MES integration may require separate development and hardware. |
| 5. Marking quality | Black marks, fine text, shallow etching or deep engraving. | Approve physical samples against defined contrast, readability, depth and surface criteria. | One sample does not establish long-term process capability or corrosion performance. |
| 6. Safety and extraction | Every industrial laser installation. | Review enclosure, interlocks, viewing protection, extraction and local safety requirements. | Safety depends on the complete installation and applicable regulations. |
| 7. Electrical and installation requirements | Export orders and installations outside the supplier’s domestic market. | Confirm voltage, frequency, plug, rated consumption, dimensions and operating environment. | Do not assume a standard domestic configuration will match the destination site. |
| 8. Service, warranty and spare parts | Production workshops where downtime affects delivery. | Get written warranty terms, support channels, spare-part list and software backup arrangements. | Warranty coverage and response times depend on the agreed contract. |
Before paying a deposit, get these details written into the quotation:
- Exact laser source brand and model.
- Conventional or MOPA source architecture.
- Rated power and source specifications.
- Scanner and field lens models.
- Working field and working distance.
- Controller and software version.
- Worktable, Z-axis, rotary or fixture configuration.
- Enclosure, interlocks and extraction arrangement.
- Sample acceptance criteria.
- Warranty, training and spare-parts scope.
Configuration Comparison: Which 20W Setup Fits Your Workshop?
The following comparison is intended to help buyers choose a configuration direction. The actual machine price and performance depend on the selected components and sample-test results.
| Configuration | Best suited to | Main advantage | What to check before ordering |
|---|---|---|---|
| 20W conventional fiber + 110 × 110 mm lens | General serial numbers, logos and small stainless steel nameplates. | Practical standard configuration for common metal marking jobs. | Confirm the required contrast, character size and actual cycle time. |
| 20W MOPA + suitable lens | Buyers who need more pulse-control flexibility or want to develop specific stainless steel surface effects. | Adjustable pulse width on supported source models. | Compare actual samples against conventional fiber. Confirm exact source model. |
| 20W fiber + larger field lens | Larger nameplates or workpieces requiring a wider marking area. | More usable marking area for suitable parts. | Test small text, QR codes and edge quality across the field. |
| 20W fiber + rotary axis | Stainless steel bottles, tubes and compatible cylindrical components. | Allows rotational marking of suitable round parts. | Check diameter, length, chuck/roller arrangement, clearance and artwork distortion. |
| 20W fiber + fixture / batch worktable | Small repeated components and batch production. | Can reduce manual positioning time and improve loading consistency. | Validate loading, focus, positioning and the actual batch cycle time. |
| 20W enclosed system | Workshops requiring a more controlled laser work area. | Can provide a more integrated safety arrangement when correctly designed. | Verify enclosure design, interlocks, viewing protection and extraction. |
My recommendation by application
- General stainless steel nameplates: start with a 20W conventional fiber configuration and a 110 × 110 mm lens.
- Black marking development: compare conventional fiber and 20W MOPA samples before deciding.
- Large parts: check a larger field lens, but do not sacrifice required detail without testing.
- Bottles and tubes: consider a rotary configuration and test the actual diameter and artwork.
- Batch production: invest attention in fixture design and loading time, not just laser power.
What Affects the Price of a 20W Fiber Laser Marking Machine?
There is no single price for every 20W machine. Two quotations can look similar but include different laser sources, scanners, lenses, software, tables and safety arrangements.
When comparing offers, separate the price into the following items:
- Laser source brand, model and architecture.
- Galvo scanner and field lens.
- Controller and marking software.
- Motorized Z-axis or manual height adjustment.
- Rotary axis and fixtures.
- Protective enclosure and extraction.
- Computer, accessories and electrical configuration.
- Shipping, installation, training and warranty.
A lower-priced machine may be perfectly suitable for a simple marking job. But if the quotation excludes the fixture, enclosure or required data functions, the final investment may be higher than expected.
Do not compare only the machine price. Compare the complete configuration required to produce your approved sample and meet your production target.
Why Consider JQ Laser for Your 20W Fiber Laser Marking Machine?
JQ Laser supplies fiber laser marking machine configurations for metal identification, nameplates, logos, serial numbers and other industrial marking applications.
Common configuration options include:
- 20W, 30W, 50W and 100W fiber laser power options.
- 1064 nm fiber laser source configurations.
- Different field lenses to match workpiece size and marking detail.
- Optional rotary axes and workholding fixtures.
- Software and controller configurations for standard marking jobs.
- Automation options for suitable production requirements.
We recommend choosing the machine around the actual workpiece rather than starting with the highest power option.
What to send us for a useful quotation
- Photos or drawings of your stainless steel parts.
- Material grade and surface finish, if known.
- Part dimensions and thickness.
- Marking artwork, text or code requirements.
- Required appearance: black, white, etched or engraved.
- Production quantity and target cycle time.
- Whether the parts are flat, cylindrical or irregular.
- Any special corrosion, cleaning or safety requirements.
With these details, we can discuss whether a standard 20W configuration is sufficient or whether you should compare MOPA, a different lens, a rotary axis or a customized fixture.
Request a sample test or quotation: Contact JQ Laser.
Related product pages:
- Fiber Laser Marking Machine
- 20W Fiber Laser Marking Machine
- MOPA Laser Marking Machine
- Automatic Laser Marking Machine
- After-Sales Support
Final configuration, machine price, delivery time and warranty depend on the actual quotation and destination. Marking quality and cycle time must be confirmed using representative workpieces.
Frequently Asked Questions
1. Can a 20W fiber laser mark 304 stainless steel?
Yes. A 20W pulsed fiber laser is a practical candidate for many 304 stainless steel marking applications, including serial numbers, logos, nameplates and identification codes. The result depends on the source, lens, surface finish and process settings.
2. Is 20W enough for stainless steel engraving?
It can handle many marking and lighter engraving jobs. For deeper engraving or demanding production targets, test the actual required depth and cycle time. A 50W or higher system may be worth comparing if the 20W system cannot meet the target efficiently.
3. Should I choose a 20W conventional fiber laser or a 20W MOPA laser?
Choose conventional fiber as a starting point for many general identification jobs. Evaluate MOPA when adjustable pulse width and frequency provide useful flexibility for your marking result. Compare physical samples before paying extra.
4. Can a 20W fiber laser produce black marks on stainless steel?
It may be possible under suitable process conditions. The result depends on the source architecture, pulse characteristics, speed, frequency, hatch spacing, focus and surface finish. MOPA provides more pulse-width control on supported models, but it does not guarantee a black result.
5. What marking field is best for a 20W fiber laser?
A 110 × 110 mm field is a common starting configuration for small metal parts and nameplates. Larger fields can be useful for larger components, but test fine text and code readability before selecting a larger lens.
6. Can a 20W fiber laser mark stainless steel bottles?
Yes, suitable cylindrical parts can be marked with a compatible rotary axis. Check the diameter, length, chuck or roller arrangement, clearance and artwork requirements. A flat-field test alone does not prove that the rotary setup will work.
7. What software does a 20W fiber laser marking machine use?
Many configurations use EZCAD-family software with a compatible controller. Confirm the exact controller, software version, variable-data functions and any required external system integration.
8. How do I know whether a 20W machine is fast enough for my factory?
Send the actual artwork and workpiece to the supplier for a test. Record laser-on time and complete cycle time, including loading, positioning, unloading and inspection. Compare accepted parts per hour rather than relying on scanner speed alone.
Technical Sources and References
- JPT 20W M7 Fiber Laser Source and Machine Specifications. Published specifications for the YDFLP-E-20-M7-S-R MOPA source, including wavelength, pulse width, frequency, pulse energy and a stated machine configuration.
- JPT M7 20–100W MOPA Fiber Laser Range. Manufacturer information on MOPA source options and technical characteristics.
- JPT N-Series Fiber Laser User Manual. Reference specifications for a conventional 20W Q-switched fiber source, including 1064 nm wavelength, pulse width and frequency range. This is a different source architecture from the M7 MOPA example.
- 2mPhotonics Fiber Laser Marking Machine Datasheet. Example of a complete machine specification with a 20W option, 1064 nm wavelength, 110 × 110 mm lens and other listed system details.
- KEYENCE: Stainless Steel Engraving and Marking Solutions. Background on stainless steel marking methods and the differences between surface marking and engraving.
- GS1 Barcode Standards. Reference for barcode and 2D code formats used in identification and traceability applications.
- JQ Laser Fiber Laser Marking Machine. JQ Laser’s product range and machine configuration reference.
Source and specification note: manufacturer datasheets describe specific source models or machine configurations. Values from different sources must not be combined and presented as one guaranteed JQ Laser specification. The final source model, scanner, lens, software and safety configuration should be confirmed in the quotation. Application results must be validated on the customer’s actual workpiece.