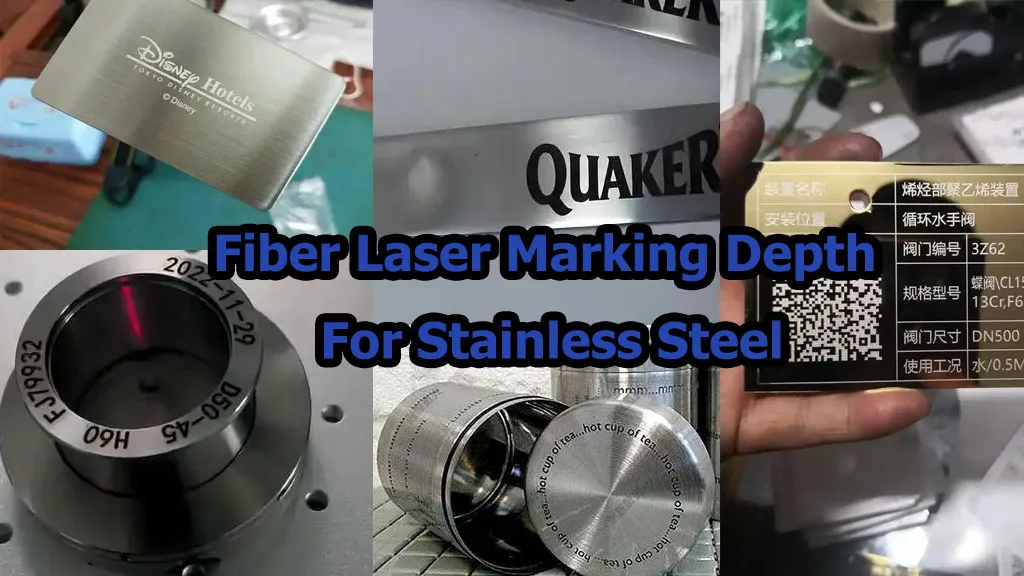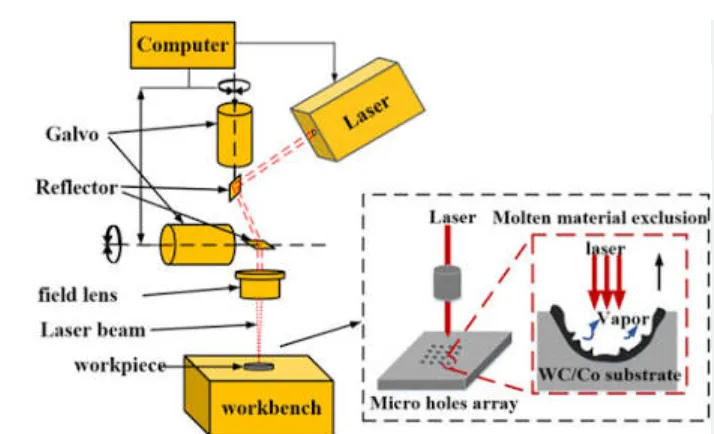
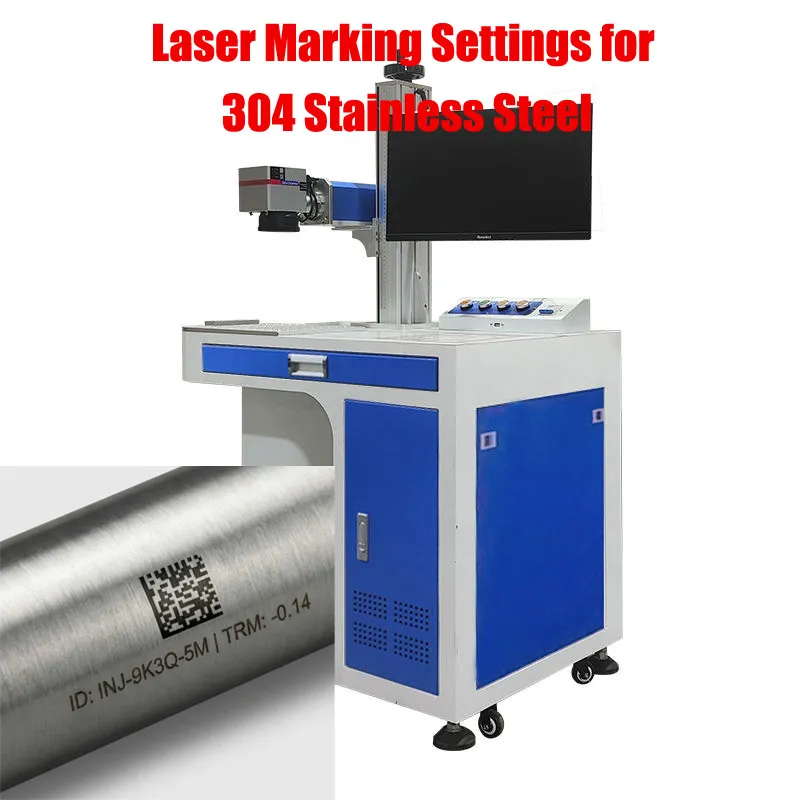
Bottom line: Laser Marking Settings for 304 Stainless Steel.There is no single laser setting that works for every 304 stainless steel part. If you want a smooth black mark, you need to control heat input and surface oxidation. If you want a shallow etched mark or deep engraving, the process is different.
For most 304 stainless steel marking jobs, a 1064 nm pulsed fiber laser is a practical starting point. A conventional fiber source can handle many identification and engraving tasks. A MOPA fiber laser is worth considering when you need more control over pulse width and frequency, particularly when developing a black marking or fine-detail process.
Before ordering a machine, test the actual 304 stainless steel grade, surface finish, artwork and production cycle. Do not choose a machine based only on advertised scanning speed or a parameter chart found online.
This guide covers eight process variables, common industrial applications, equipment specifications, sample testing and purchasing decisions. It is written for manufacturers and buyers who need repeatable results rather than a one-time demonstration.
First, Understand the Three Different Results on 304 Stainless Steel
One of the most common problems in laser marking projects is that the buyer and supplier use the same word—”engraving”—but expect completely different results.
Before discussing parameters, decide which of these three processes you actually need.
1. Black annealing or oxidation marking
This process uses controlled laser heating to create a dark oxide-related surface appearance. The goal is usually a dark, readable mark with limited material removal.
It is useful for:
- Stainless steel equipment nameplates.
- Medical and surgical instrument identification, subject to validated cleaning and material requirements.
- Food-processing equipment labels and identification areas.
- Logos, serial numbers and product traceability codes.
- Decorative black logos on selected stainless steel products.
What to watch: a mark can look black but still have an unsuitable surface condition or corrosion performance. If the component will be exposed to water, cleaning chemicals, salt or other corrosive environments, visual appearance alone is not enough.
2. Surface etching
Etching removes or modifies a relatively shallow surface layer to create contrast. It is useful when the customer wants a more tactile or clearly defined mark without requiring a deep engraved groove.
Common applications include:
- Industrial equipment nameplates.
- Stainless steel control panels.
- Product labels and model numbers.
- Batch numbers and identification marks.
What to watch: excessive heat or material removal can affect the surface finish. On corrosion-sensitive parts, the post-marking process must be evaluated.
3. Deep engraving
Deep engraving intentionally removes more material. It may be needed for durable identification, machined parts, tools and components where the mark must remain visible after surface wear or finishing.
Common applications include:
- Machine components and metal tooling.
- Industrial shafts, brackets and fixtures.
- Stainless steel parts requiring a recessed serial number.
- Components where the mark must remain identifiable after handling.
What to watch: deep engraving takes more processing time and can create a larger heat-affected area. The required depth, part thickness, dimensional tolerance and downstream finishing process must all be considered.
| Process | Main objective | Material removal | Important inspection |
|---|---|---|---|
| Black annealing | Dark, readable surface mark | Normally limited | Color consistency, surface condition and corrosion performance |
| Surface etching | Visible contrast and defined lines | Shallow removal or surface modification | Contrast, edge quality and surface finish |
| Deep engraving | Recessed, durable identification | Intentional material removal | Depth, roughness, burrs and dimensional effect |
These processes should not share one parameter recipe. A setting developed for black annealing is not automatically suitable for deep engraving.
Where Is Laser Marking Used on 304 Stainless Steel?
1. Food processing equipment
304 stainless steel is widely used in food-processing equipment, tanks, fittings, housings and selected production components.
Typical marking requirements include equipment IDs, model numbers, maintenance information and traceability codes.
Production concern: a dark mark is not automatically a hygienic or corrosion-resistant mark. Consider the surface finish, cleaning chemicals, exposure conditions and whether the marking area must meet a particular sanitary specification.
2. Medical and laboratory equipment
304 stainless steel can appear in laboratory equipment, housings, accessories and selected instrument components. Marking may include serial numbers, logos and identification information.
Production concern: distinguish general equipment identification from regulated medical-device direct marking. If the part has validated cleaning, sterilization or biocompatibility requirements, the marking process must be evaluated as part of the finished device.
3. Stainless steel nameplates and control panels
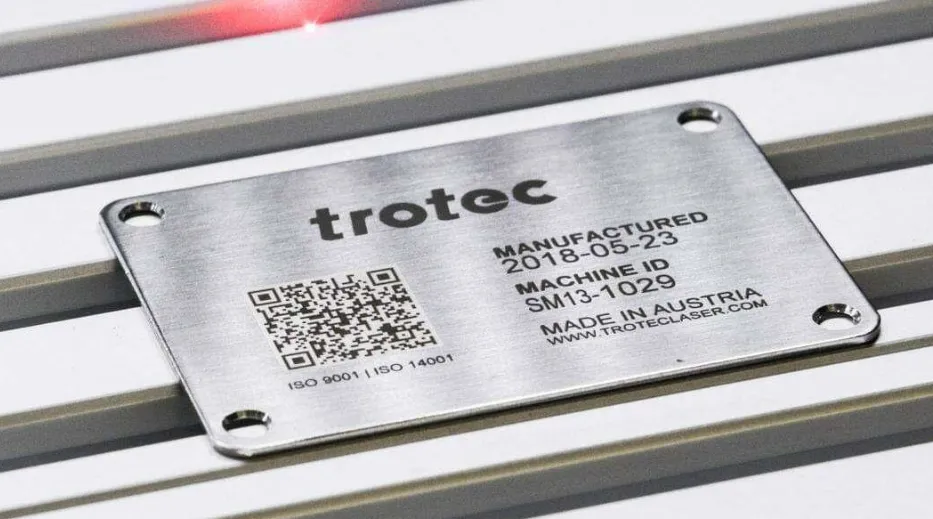
Manufacturers often mark model numbers, electrical ratings, logos, serial numbers and QR codes on stainless steel nameplates.
Production concern: small text and codes need consistent contrast. Test the smallest character size and confirm readability with the intended inspection equipment.
4. Automotive and mechanical components
304 stainless steel components may require part numbers, batch IDs, supplier codes and other identification marks.
Production concern: the marking position must not interfere with sealing surfaces, precision fits or functional areas. Check the component drawing before approving the marking location.
5. Kitchenware and consumer products
Stainless steel bottles, cookware, utensils, thermos housings and decorative products may need logos, model numbers or personalized designs.
Production concern: brushed, polished and mirror-finished surfaces can produce different results. A sample made on a flat brushed coupon may not represent a curved, polished finished product.
6. Industrial tools and hardware
Tools, fixtures, fasteners, measuring equipment and selected metal components may need permanent identification.
Production concern: determine whether the mark needs only to be visible or must remain readable after abrasion, cleaning, coating or other downstream processing.
8 Laser Marking Process Variables to Test on 304 Stainless Steel
The best way to develop a reliable process is to control the variables rather than change settings randomly. These eight factors have a practical influence on marking quality, processing time and the condition of the finished surface.
Variable 1: Average Laser Power
Average power affects the amount of energy available during processing. It influences the speed at which a mark can be produced and the amount of material that can be modified or removed.
But more power does not automatically mean a better mark.
For black marking, excessive energy can create unwanted heat effects, discoloration outside the intended area or a surface condition that fails the customer’s requirements. For deep engraving, insufficient power may mean more passes and longer processing time.
What to test:
- Start with a moderate power setting appropriate for the source.
- Test several power levels while keeping the other main variables unchanged.
- Compare blackness, contrast, edge definition, surface condition and processing time.
- For engraving, measure actual depth rather than judging only by appearance.
Practical example: a 304 nameplate with a small serial number may not need the same power strategy as a thick stainless steel fixture requiring a recessed part number.
Limitation: a software power percentage is not a universal optical output value. Its relationship to actual laser output depends on the source and control system.
Variable 2: Scanning Speed
Scanning speed determines how quickly the beam moves across the material. It affects energy delivered per unit length and works together with power, pulse frequency and spot size.
If the speed is too high for the selected process, the mark may be weak or incomplete. If it is too low, the surface may receive excessive heat, and the cycle time may become unnecessarily long.
What to test:
- Create a speed test grid using the same artwork and material.
- Compare mark intensity and edge quality.
- Check whether small text and large filled areas respond differently.
- Record laser-on time and full production cycle time separately.
Practical example: a large filled logo may take longer than a short serial number, even if both are processed on the same machine.
Limitation: scanner maximum speed is not the same as actual parts-per-hour output. Loading, positioning, data handling and inspection also take time.
Variable 3: Pulse Frequency
Pulse frequency is the number of laser pulses delivered per second. It affects pulse overlap and interacts with pulse energy and scanning speed.
When frequency changes, the energy delivered by each pulse can also change depending on the source’s operating conditions. This is why frequency should not be adjusted independently without checking the rest of the process.
What to test:
- Select several frequencies within the actual source’s supported range.
- Keep the artwork, material, focus and scan speed consistent for the initial comparison.
- Inspect line continuity, mark intensity and surface roughness.
- Record whether the best result is achieved with a single pass or multiple passes.
Equipment reference: JPT M7 20W and 30W MOPA source specifications list a frequency range of 1–4000 kHz.
Limitation: this is a source specification, not a recommended 304 stainless steel operating range. The usable process window depends on the desired mark and other parameters.
Variable 4: Pulse Width
Pulse width describes how long each pulse lasts. It is an important variable when using a MOPA fiber laser because the operator can adjust pulse duration within the limits of the selected source.
Shorter and longer pulses can produce different material interactions. The right choice depends on whether the target is a dark surface mark, fine detail, controlled etching or deeper material removal.
What to test:
- Use several pulse-width settings supported by the actual laser source.
- Compare the results on the same 304 stainless steel batch and surface finish.
- Inspect the mark under consistent lighting and magnification.
- Check the surface condition after cleaning.
Equipment reference: the JPT YDFLP-E-20-M7-S-R and YDFLP-E-30-M7-S-R source specifications list an adjustable pulse-width range of 2–350 ns.
Limitation: a conventional fixed-pulse fiber source does not necessarily provide the same independent pulse-width control as a MOPA source. Confirm the exact model before comparing machines.
Variable 5: Hatch Spacing and Line Overlap
Hatch spacing controls the distance between adjacent scan lines when the laser fills a shape or processes a larger area.
If the spacing is too wide, the result may show gaps or uneven coverage. If it is too tight, overlapping heat input may increase the thermal effect and processing time.
What to test:
- Prepare a filled test pattern with several hatch-spacing values.
- Inspect the uniformity of the marked area.
- Compare edge quality and visible scan lines.
- Measure cycle time for each test.
Research reference: published experimental work on AISI 304 has investigated the effect of raster step, scanning speed and pass strategy on surface roughness and color. One 2026 study used raster-step values from 20 to 80 μm in its experimental matrices. These are research conditions, not universal machine presets.
Limitation: the best hatch spacing depends on spot size, lens, artwork, material finish and process objective.
Variable 6: Focus Position and Lens Selection
Focus affects the beam spot size and energy density at the workpiece. Incorrect focus can reduce line definition, change the marking appearance and affect consistency across the working field.
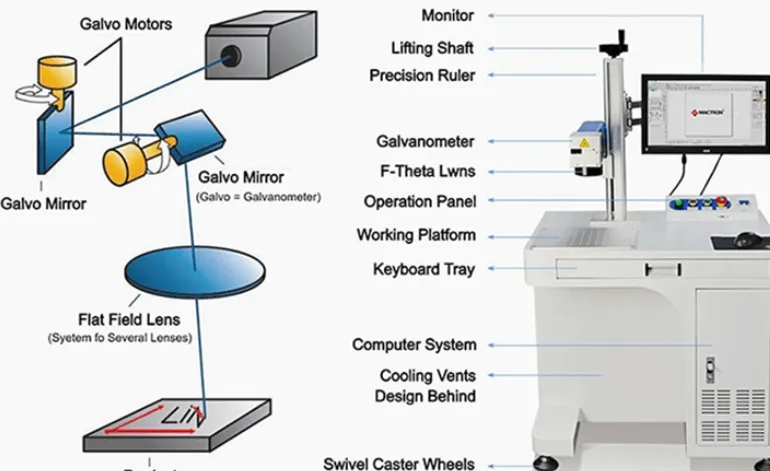
The lens also determines the marking field. A larger field is convenient for larger parts or multiple parts in one fixture, but it can change the optical spot size and detail capability.
What to test:
- Confirm the correct working distance for the selected lens.
- Check focus using the manufacturer’s recommended method.
- Test the center and edges of the marking field.
- Compare the smallest text and line detail using the proposed lens.
JQ Laser configuration reference: common fiber laser configurations use a 110 × 110 mm standard marking field, with optional lens fields such as 70 × 70, 150 × 150, 175 × 175, 200 × 200 or larger depending on the machine configuration.
Limitation: not every lens option is available on every machine or scanner combination. Confirm the actual lens and working distance in the quotation.
Variable 7: Number of Passes and Pass Strategy
A single pass may be sufficient for some identification marks. Deeper engraving may require multiple passes.
However, adding passes does not guarantee a better result. Repeated heating can affect the surrounding surface, increase processing time and create unwanted roughness.
What to test:
- Compare single-pass and multi-pass results.
- Measure depth if material removal is required.
- Inspect the edge of the engraving for burrs or raised material.
- Check the surface finish after any cleaning or finishing operation.
Practical solution: record the complete pass strategy. If different passes use different speed, power or hatch direction, document each stage.
Limitation: the appropriate depth depends on the part thickness, function, tolerance and customer’s specification. Do not apply deep engraving to a thin or precision component without checking its engineering requirements.
Variable 8: Surface Finish, Cleaning and Material Condition
This is one of the most overlooked variables in production.
Two parts can both be called 304 stainless steel but produce different results because one is mirror polished and the other is brushed. Surface contamination, oil, protective film, polishing compound and previous chemical treatment can also affect the result.
What to test:
- Compare the actual incoming surface finishes.
- Record whether the material is 2B, brushed, polished or another specified finish.
- Clean samples using the normal production method.
- Compare results from different material batches.
- Inspect the finished mark after the normal cleaning and finishing process.
Practical solution: define an incoming-material and cleaning procedure. If a marking recipe works only on one unusually clean sample, it is not yet a reliable production process.
Limitation: laser settings cannot compensate for inconsistent material grade, surface contamination or an unsuitable marking location.
Which Laser Marking Machine Should You Choose for 304 Stainless Steel?
For most 304 stainless steel marking applications, a 1064 nm pulsed fiber laser is a practical equipment category to evaluate. The final choice depends on the marking result, production volume, part size and whether pulse-width flexibility is important.
JQ Laser fiber machine power options
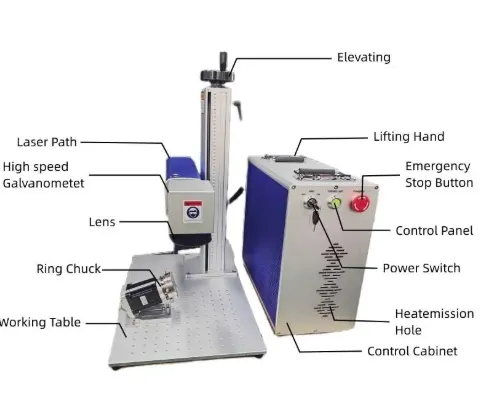
JQ Laser’s published fiber laser product range includes 20W, 30W, 50W and 100W configurations. Typical machine configurations use a 1064 nm fiber laser source, air cooling and a 110 × 110 mm standard marking field, with optional lens sizes depending on the selected optical setup.
| Power | Applications to evaluate | What to verify |
|---|---|---|
| 20W | Serial numbers, logos, small text, nameplates and general identification. | Mark contrast, detail, cycle time and whether the target result can be achieved in the required number of passes. |
| 30W | General industrial marking with additional processing capacity or a need to reduce laser-on time. | Whether the actual part cycle improves compared with 20W. |
| 50W | Evaluate for more demanding material removal, deeper engraving or higher production requirements. | Depth, surface quality, heat input and production economics. |
| 100W | Evaluate for demanding industrial applications where higher power can provide a measurable process advantage. | Part thickness, required depth, scanner capability, thermal effects and safety requirements. |
These power options are not a guarantee that every 304 stainless steel application needs higher wattage. If a 20W system meets the customer’s contrast, quality and cycle-time requirements, moving to 50W or 100W may not be economically justified.
Example: JPT M7 MOPA laser source specifications
For buyers considering adjustable pulse control, the following published source specifications are useful reference points.
| Parameter | 20W M7 | 30W M7 |
|---|---|---|
| Source model | YDFLP-E-20-M7-S-R | YDFLP-E-30-M7-S-R |
| Architecture | MOPA | MOPA |
| Average output power | >20W | >30W |
| Wavelength | 1064 nm | 1064 nm |
| Pulse width | 2–350 ns | 2–350 ns |
| Frequency | 1–4000 kHz | 1–4000 kHz |
| Maximum pulse energy | 0.8 mJ | 0.8 mJ |
| Beam quality M² | <1.4 | <1.4 |
| Cooling | Air-cooled | Air-cooled |
These are laser source specifications, not a complete machine specification. A finished machine also depends on its scanner, lens, controller, software, enclosure, Z-axis and other components. Confirm the exact source model and optical configuration in the quotation.
For comparison, the published JPT M7 20W machine information lists a 6000 mm/s maximum marking speed on its stated scanner configuration and a 175 × 175 mm working area with the corresponding lens. This is a specific machine configuration, not a universal speed or field specification for all JQ Laser machines.
Technical source references:
- JPT 20W M7 Fiber Laser Source and Machine Specifications
- JPT 30W M7 Fiber Laser Source Specifications
- JPT M7 20–100W MOPA Fiber Laser Range
Do you need MOPA for 304 stainless steel?
Not for every job.
A conventional pulsed fiber laser may be sufficient for many serial numbers, logos and general identification marks. MOPA becomes worth evaluating when adjustable pulse width and frequency provide useful process flexibility, especially when the target is a specific black appearance or a more controlled surface result.
However, MOPA does not guarantee a black mark. A poor combination of pulse settings, scan speed and hatch spacing can still produce uneven color or an undesirable surface condition.
My recommendation is simple: compare the actual samples from a conventional fiber source and a MOPA source. If the difference is important to the customer’s specification, then the additional MOPA cost may be justified.
How to Build a Reliable 304 Stainless Steel Laser Test Matrix
A supplier demonstration is useful, but one successful sample does not prove that a process is ready for production.
Use the following method to make the result repeatable.
Step 1: Confirm the material
- Confirm the material grade is 304 or the specified equivalent.
- Record the material supplier and batch where possible.
- Record thickness and surface finish.
- Confirm whether the part has been polished, coated or chemically treated.
Step 2: Define the target
Specify whether you need black annealing, surface etching or deep engraving. Define the required contrast, line width, character size, depth and acceptable surface condition.
Step 3: Run a controlled parameter matrix
Start with a small matrix of power and speed. Once a promising region is identified, test pulse frequency and pulse width if the source supports them. Then optimize hatch spacing, focus and pass count.
Do not change every variable at once. If the result changes, you need to know why.
Step 4: Inspect the actual result
- Mark color and contrast under consistent lighting.
- Character edges and fine-line definition.
- Surface roughness and visible heat effects.
- Material removal and engraving depth where required.
- Surface condition outside the marking area.
- Readability of QR codes or Data Matrix codes with the intended reader.
Step 5: Test repeatability
Repeat the same approved settings on several parts from the actual production batch. Check whether the result remains consistent across operators, workpiece positions and normal production conditions.
Step 6: Test the downstream process
If the component will be cleaned, polished, passivated, coated or exposed to cleaning chemicals, test the finished part after that process. A mark that looks excellent immediately after laser processing may not remain acceptable after finishing.
Step 7: Measure complete production time
Record:
- Loading time.
- Positioning and focusing time.
- Laser-on time.
- Unloading time.
- Inspection time.
- Rework or rejection rate.
For a production line, the full cycle time is more useful than the scanner speed printed on a brochure.
Step 8: Save the approved process record
Record the source model, machine configuration, lens, artwork, power, speed, frequency, pulse width, hatch spacing, focus, pass count, material batch and inspection result. This makes it easier to reproduce the process after delivery.
Buyer Checklist: 8 Things to Verify Before Buying a 304 Stainless Steel Laser Marker
Use this list when comparing suppliers. A good quotation should explain what the machine can do on your actual part—not simply list wattage and maximum speed.
| Purchase check | Applicable conditions | Evidence or test method | Limitations |
|---|---|---|---|
| 1. Laser source and power | General marking, high-volume production or deep engraving. | Confirm source brand, exact model, rated power and datasheet. Test the actual 304 part. | Higher rated power does not automatically improve contrast or surface quality. |
| 2. MOPA pulse control | Black marking development, fine-detail processing or applications requiring pulse flexibility. | Verify the source’s pulse-width and frequency ranges. Compare real samples. | Adjustable pulse settings do not guarantee a particular black shade. |
| 3. Lens and marking field | Small text, large nameplates, multiple parts per cycle or detailed logos. | Confirm the lens model, working distance and actual marking field. Test details at the field edges. | A larger field may reduce detail capability depending on the optical configuration. |
| 4. Marking result | Black annealing, shallow etching or deep engraving. | Agree on the required appearance, depth, contrast and inspection criteria before testing. | A photograph cannot replace a physical sample inspection. |
| 5. Corrosion and surface requirements | Food equipment, medical-related parts, outdoor products or components exposed to chemicals. | Review the application requirements and test the marked part after the specified cleaning or passivation process. | A visually acceptable mark does not prove corrosion resistance or regulatory compliance. |
| 6. Fixture and automation | Small parts, cylindrical components, repeat production or conveyor applications. | Run repeated samples with the proposed fixture, rotary or conveyor arrangement. | A standard fixture may not fit every part geometry. |
| 7. Software and data handling | Serial numbers, batch IDs, variable text, QR codes and Data Matrix codes. | Test the actual data workflow, file formats, job selection and code reading. | Standard marking software does not automatically include ERP or database integration. |
| 8. Safety, service and spare parts | Every industrial laser installation. | Review enclosure, interlocks, extraction, training, warranty and spare-parts arrangements. | Safety classification and service scope depend on the delivered configuration and local requirements. |
What should be written into the quotation?
- Laser source brand, model, rated power and wavelength.
- Pulse-width and frequency ranges if MOPA is supplied.
- Scanner model and lens specification.
- Standard and optional marking fields.
- Controller and software version.
- Rotary, fixture or automation configuration.
- Protective enclosure, interlocks and extraction arrangement.
- Sample-test acceptance criteria.
- Training, warranty and spare-parts scope.
Comparison: Conventional Fiber Laser, MOPA Fiber Laser and UV Laser for 304 Stainless Steel
For 304 stainless steel, a 1064 nm fiber laser is usually the first equipment category to evaluate. MOPA is a fiber laser architecture with additional pulse control. UV laser systems operate at a different wavelength and should be considered when the application has a specific reason to use ultraviolet processing.
| Factor | Conventional fiber | MOPA fiber | UV laser |
|---|---|---|---|
| Typical wavelength | 1064 nm | 1064 nm | Commonly 355 nm |
| Pulse control | Depends on source architecture; often more limited. | Adjustable pulse width and frequency on supported models. | Depends on the UV source and system. |
| General 304 marking | Suitable for many identification and engraving jobs. | Suitable for general marking and more flexible process development. | Can be evaluated for specialized fine-detail or heat-sensitive applications. |
| Black marking | Possible with suitable process conditions. | More pulse-control options for developing a suitable process. | Must be tested for the required appearance and material. |
| Deep engraving | Possible with suitable power and pass strategy. | Possible with suitable power and pass strategy. | Not normally the first choice for high-volume deep metal removal. |
| Typical buyer concern | Whether the process meets the required mark quality and cycle time. | Whether pulse flexibility provides enough measurable benefit to justify cost. | Whether the application truly needs UV processing. |
Practical decision:
- Choose conventional fiber as a candidate for standard serial numbers, logos and general identification.
- Evaluate MOPA when black marking, fine-detail control or process flexibility is important.
- Consider UV when the actual application requires a different interaction, especially on selected non-metallic materials or specialized marking tasks. Do not buy UV simply because it sounds more precise.
Important: Does Laser Marking Affect 304 Stainless Steel Corrosion Resistance?
This question matters more than many buyers realize.
304 stainless steel relies on a passive chromium-rich surface film for corrosion resistance. Laser processing changes the surface through heat, oxidation or material removal. Depending on the process and material condition, the marked area may behave differently from the unmarked surface.
Research on stainless steel laser marking has reported that process parameters and material composition can influence corrosion performance. Some marking conditions may lead to corrosion or oxide-layer problems. Post-marking chemical passivation may be appropriate for certain applications, but it must be selected and validated for the actual component.
When should you pay particular attention?
- Food-processing equipment exposed to repeated washing.
- Medical or laboratory components with defined cleaning requirements.
- Outdoor stainless steel parts exposed to rain or salt.
- Parts used around detergents, disinfectants or industrial chemicals.
- Components where corrosion resistance is part of the drawing or purchase specification.
What should you do?
- Identify the actual stainless steel grade and service environment.
- Define whether the process is black annealing, etching or deep engraving.
- Evaluate the surface after marking, not only its color.
- Where required, validate an appropriate cleaning and passivation procedure.
- Use the customer’s specified corrosion test or acceptance standard.
ASTM A967/A967M and AMS2700 are examples of specifications associated with chemical passivation of stainless steel. Their applicability depends on the component, industry and customer requirements. Do not claim compliance simply because a part has been laser marked or cleaned.
Important distinction: laser marking equipment manufacturers can help develop the marking process, but corrosion qualification should follow the customer’s engineering specification and appropriate testing procedure.
How JQ Laser Can Help with 304 Stainless Steel Marking
JQ Laser supplies fiber laser marking machine configurations with 20W, 30W, 50W and 100W power options. Typical systems use 1064 nm fiber laser sources, with lens and marking-field choices depending on the application.
For 304 stainless steel, we recommend starting with your real part and required mark. If the target is a black logo, we need to see the surface finish and required color. If it is deep engraving, we need the target depth, part thickness and production quantity.
Send us these details for a technical recommendation
- 304 stainless steel part or material sample.
- Surface finish: 2B, brushed, polished, mirror finish or another specification.
- Part dimensions and thickness.
- Required result: black marking, shallow etching or deep engraving.
- Artwork, serial number or code content.
- Required character size, line width or engraving depth.
- Production quantity and target cycle time.
- Any cleaning, passivation or corrosion requirements.
- Whether you need a rotary fixture, conveyor or automatic positioning.
With these details, we can discuss which source power, lens and machine configuration should be tested first. The final recommendation should be based on the sample result and production requirements.
Request a sample test or quotation: Contact JQ Laser.
Related pages:
- Fiber Laser Marking Machine
- MOPA Laser Marking Machine
- 50W Fiber Laser Marking Machine
- Automatic Laser Marking Machine
Technical note: The final machine configuration and process settings depend on the actual laser source, scanner, lens, material grade, surface finish and application. The settings must be validated on representative production parts.
Frequently Asked Questions
1. What are the best laser marking settings for 304 stainless steel?
There is no universal setting. The best combination depends on whether you want black annealing, surface etching or deep engraving. Power, speed, frequency, pulse width, hatch spacing, focus and pass count should be tested on the actual material and surface finish.
2. Can a 20W fiber laser mark 304 stainless steel?
Yes. A 20W pulsed fiber laser can be a candidate for many 304 stainless steel identification jobs, logos and small text. The result and cycle time should be checked using the actual part and required appearance.
3. Is a 30W MOPA laser better than a 20W fiber laser for stainless steel?
A 30W MOPA source provides more rated average power than a 20W source and offers adjustable pulse-width control. It may provide useful process flexibility, but it does not guarantee a 50% faster production cycle or a better result. Compare both systems on the same sample.
4. How do I get a black mark on 304 stainless steel?
Black marking normally requires controlled heat input and suitable surface oxidation conditions. Test power, speed, frequency, pulse width and hatch spacing on the actual surface finish. Inspect the finished surface and corrosion requirements before production approval.
5. Can a conventional fiber laser produce black marking on 304 stainless steel?
It may be possible with a suitable source and process conditions. MOPA offers more pulse-width flexibility, but the final result depends on the material, source, optics and parameters.
6. What marking field should I choose for 304 stainless steel?
A 110 × 110 mm field is a common starting configuration for many nameplates and smaller parts. Larger fields can help with bigger components or multiple parts in one fixture, but the optical spot size and fine-detail performance should be checked before ordering.
7. Does laser marking reduce stainless steel corrosion resistance?
It can affect the surface condition depending on the process and material. For corrosion-sensitive parts, validate the marking and any post-marking cleaning or passivation procedure against the customer’s required specification.
8. How can I make laser marking on 304 stainless steel more consistent?
Control the material batch, surface finish, cleaning method, focus, fixture, parameter recipe and inspection procedure. Save approved settings and repeat the process on several representative production parts before release.
Technical Sources and Further Reading
- KEYENCE: Stainless Steel Engraving and Marking Solutions. Explains annealing, etching and engraving, surface condition, corrosion considerations and passivation.
- Experimental Investigation into Fibre Laser Marking on Stainless Steel 304. Research on the influence of transverse feed, average laser power and scanning speed on marking quality.
- Influence of Laser Marking Parameters on Color Generation in AISI 304 Stainless Steel. Experimental study of raster step, scan speed and pass strategy and their influence on surface color and roughness.
- Parametric Study on Laser Marking of Circular Shape on Stainless Steel 304. Research on the influence of power, pulse frequency, duty cycle, scanning speed and transverse feed.
- Industrial Laser Marking Guidelines. Discusses stainless steel material selection, corrosion resistance and post-marking passivation considerations.
- JPT 20W M7 Fiber Laser Source Specifications. Source model, wavelength, pulse width, frequency, pulse energy and stated machine configuration.
- JPT 30W M7 Fiber Laser Source Specifications. Published source specifications and scanner configuration.
- JPT M7 20–100W MOPA Fiber Laser Range. Manufacturer information about MOPA architecture and source options.
- JQ Laser Fiber Laser Marking Machine. JQ Laser product range and machine configuration reference.
How to interpret these sources: the research papers demonstrate that process parameters affect stainless steel marking results, but their experimental conditions are not universal production presets. JPT’s published data describes the laser source and the stated machine configuration, not every machine sold by JQ Laser. The final settings and corrosion performance must be verified on the actual part.