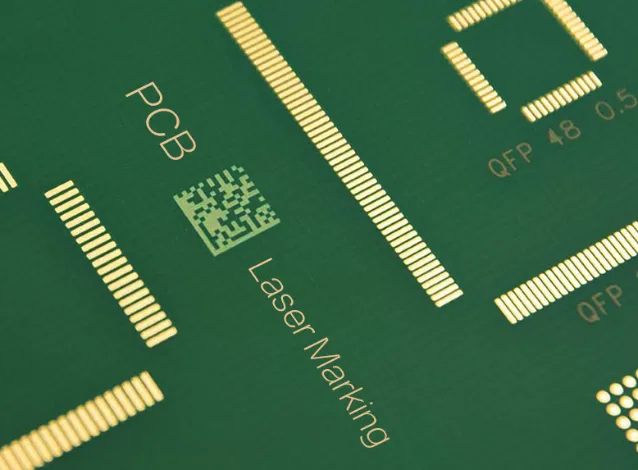
Gold & Silver Laser Marking Machine
Precise laser marking solutions for gold, silver and precious-metal jewelry. Suitable for rings, pendants, bracelets, jewelry components, personalization, logos, serial numbers and decorative marking.
Actual laser power, lens, rotary configuration and marking parameters should be confirmed through sample testing.
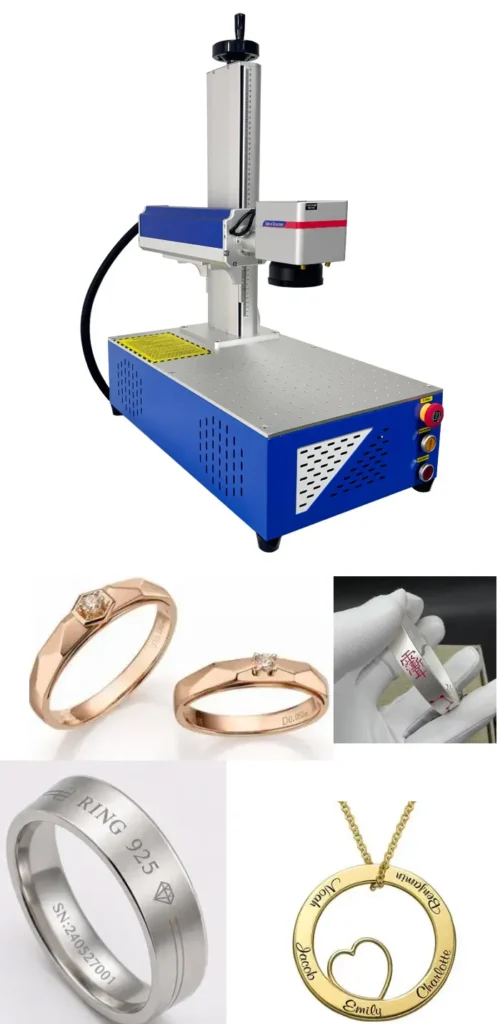
What Can You Mark on Gold & Silver Jewelry?
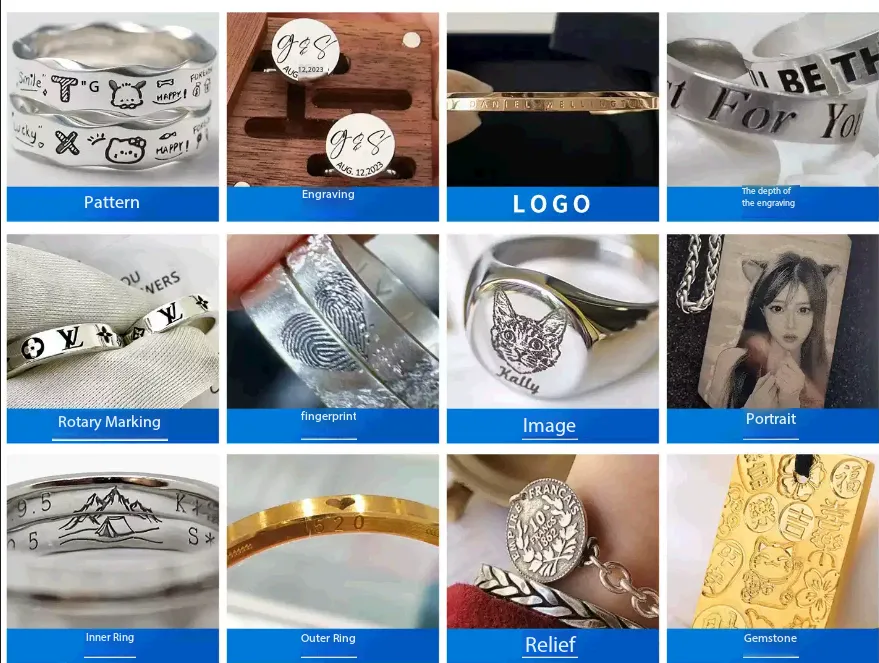
Gold and silver laser marking is not limited to simple text. The same laser marking system can be configured for jewelry personalization, logos, identification marks and decorative engraving. The right setup depends mainly on the shape, surface finish, alloy and marking requirement of the jewelry.
Gold Ring Marking
Mark names, initials, dates, messages, logos or other personalized information on gold rings.
Typical setup:
Fiber laser + suitable ring fixture or rotary axis.
Silver Ring Marking
Suitable for personalized text, logos, dates, symbols and decorative patterns on silver rings.
Key consideration:
Silver is highly reflective, so actual samples should be tested
before finalizing process parameters.
Pendant Marking
Add names, initials, symbols, logos or customized graphics to gold and silver pendants.
Typical setup:
Flat-field fiber laser with appropriate lens and fixture.
Bracelet Marking
Personalized names, dates, logos and decorative information can be marked on suitable gold and silver bracelets.
Key consideration:
The bracelet diameter and curvature determine the appropriate
fixture or rotary configuration.
Jewelry Logos & Identification
Permanent logos, identification marks, model numbers and other product information can be applied to precious-metal components.
Best for:
Jewelry manufacturers requiring repeatable product
identification.
Decorative Engraving
Fine patterns, names, symbols and customized graphics can be laser engraved on suitable gold and silver surfaces.
Important:
Fine decorative work requires the correct focus, lens and
marking parameters for the actual jewelry surface.
The Shape of the Jewelry Matters as Much as the Laser Power
Flat pendants and plates are usually straightforward. Rings, bracelets and other curved parts may require a rotary axis or customized fixture to maintain the correct marking position.
Looking for the laser system behind these applications?Fiber Laser Marking Machine · MOPA Fiber Laser · 50W Fiber Laser
Gold and Silver Are Not All the Same
A common mistake when choosing a jewelry laser is to treat every gold or silver product as the same material. In practice, alloy composition, surface finish, plating, polishing and geometry can all affect the final marking result.
| Material / Surface | Typical Jewelry Applications | Main Marking Consideration | Recommended Approach |
|---|---|---|---|
| Gold | Rings, pendants, bracelets, jewelry components | Surface finish and required marking appearance | Test laser power, speed, frequency and focus on the actual sample |
| 18K Gold | Commercial jewelry and customized pieces | Alloy composition can influence the marking response | Use the actual alloy and surface finish for parameter testing |
| 14K Gold | Jewelry, rings, pendants and personalized products | Different alloy composition may require different parameters | Sample testing before production is recommended |
| Silver | Rings, bracelets, pendants and decorative jewelry | Reflective surface and desired contrast | Develop parameters using the actual silver product |
| Sterling Silver | Jewelry and personalized silver products | Surface condition, polishing and alloy composition | Test contrast and heat input before production |
| Gold / Silver Plated | Plated jewelry and decorative products | Laser interaction may expose the underlying material | Confirm whether the required result is surface marking or layer removal |
Why We Recommend Testing the Actual Jewelry
When a customer sends us a photo of a gold ring, we can usually identify the basic machine configuration. What we cannot reliably determine from a photo is the exact alloy composition, surface treatment and the customer’s preferred marking appearance.
For that reason, we do not recommend copying one parameter set from another jewelry product and assuming the result will be identical. A short sample test is normally a better way to determine the appropriate power, speed, frequency, focus and marking strategy.
Polished vs Matte
A highly polished surface and a matte surface may require different marking parameters to achieve the desired visual contrast.
Pure Metal vs Alloy
18K, 14K and other gold alloys contain different proportions of additional metals. Silver jewelry can also vary by alloy and finish.
Contrast vs Depth
A shallow visible mark and a deeper engraved mark are different process requirements. The machine should be selected accordingly.
Need a broader material guide?Explore Laser Marking Materials → | Fiber Laser for Metal →
Which Laser Configuration Is Suitable for Gold & Silver Jewelry?
For jewelry marking, laser power is only one part of the decision. The laser source, pulse characteristics, marking lens, rotary system, workholding method and required marking effect all affect the final result.
For Jewelry Personalization
A practical starting point for workshops mainly producing names, initials, dates, logos and other relatively shallow markings.
- Small jewelry batches
- Names and initials
- Simple logos
- Personalized rings and pendants
- Lower initial equipment cost
A Balanced Choice
30W is often a sensible middle option when the customer needs more production capacity than a basic 20W system but does not require the additional power of a 50W machine.
- General jewelry production
- Gold and silver marking
- Logos and identification
- Higher production volume
- More processing margin
For Higher Throughput & Deeper Work
A better fit when production volume is higher, deeper engraving is required or the machine will also be used for broader industrial metal-marking applications.
- Higher-volume production
- Deeper engraving
- Metal jewelry components
- Industrial + jewelry applications
- More processing capacity
Our practical recommendation: If your main job is personalized jewelry, do not automatically buy 50W. Start by testing 20W or 30W. If production volume or engraving depth is the main concern, move toward 50W.
20W vs 30W vs 50W: Which One Should You Buy?
The highest-power machine is not always the best choice. Choose according to your marking depth, production volume, jewelry geometry and future workload.
| Requirement | 20W | 30W | 50W |
|---|---|---|---|
| Personalized names / initials | Excellent | Excellent | Excellent |
| Small jewelry workshops | Recommended | Recommended | Optional |
| Medium production volume | Possible | Recommended | Recommended |
| Higher production throughput | Limited | Good | Best fit |
| Deeper engraving | Limited | Good | Better suited |
| Budget sensitivity | Highest | Medium | Higher investment |
When personalization and small-batch jewelry marking are your main requirements.
When you want a balance between equipment cost and production capacity.
When higher throughput or deeper engraving is an important part of your production.
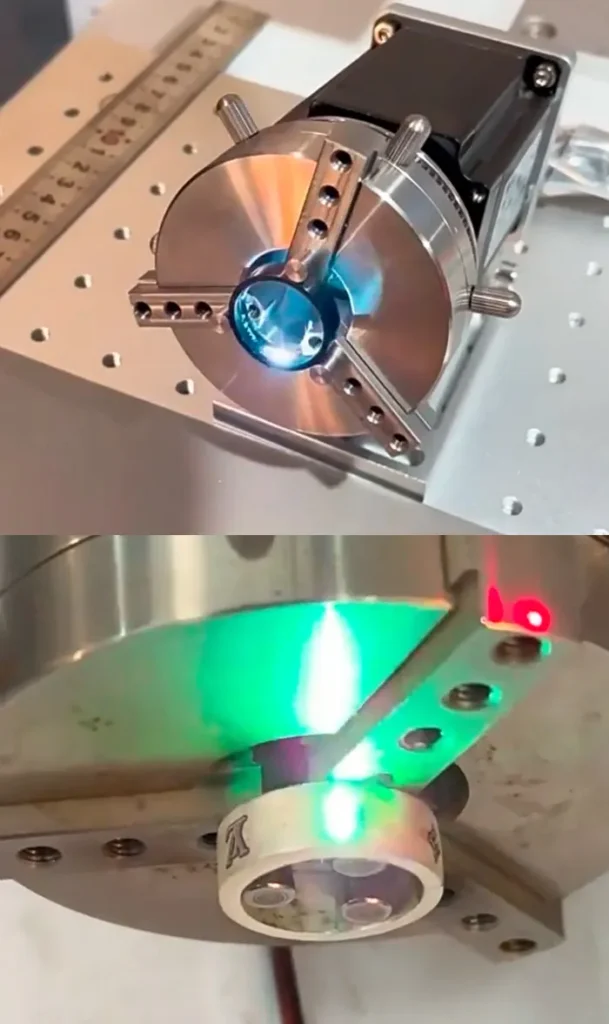
Do You Need a Rotary Axis for Rings and Bracelets?
If you are marking a flat pendant, a standard flat-field lens may be all you need. But once the marking surface becomes cylindrical or curved, the machine configuration becomes more important.
A rotary axis can rotate the workpiece while the laser marks it, which is useful for applications such as ring circumference marking, cylindrical components and some bracelet designs.
Typical Rotary Applications
- Ring outer circumference
- Ring inner circumference
- Cylindrical jewelry components
- Bracelets and curved parts
- Round metal accessories
The required rotary type depends on ring diameter, workpiece shape, marking position and required accuracy. We recommend testing the actual jewelry before selecting the final rotary configuration.
Example: 50W Fiber Laser Configuration
The following values come from an actual JQ Laser industrial delivery configuration. They are provided as a technical reference, not as a universal specification for every gold and silver application.
| Parameter | Reference Configuration | Why It Matters |
|---|---|---|
| Laser Type | Pulsed Fiber Laser | General metal marking platform |
| Rated Power | 50W | Provides greater processing capacity than lower-power configurations |
| Wavelength | 1064 nm | Common wavelength for fiber laser metal marking |
| Cooling | Forced Air Cooling | No industrial water chiller required for this configuration |
| Power Supply | AC 220V ±10%, 50/60Hz | Suitable for standard industrial electrical environments using this supply |
| Main Marking Field | 110 × 110 mm | Suitable for many small and medium marking areas |
| Additional Lens | 150 × 150 mm | Provides additional marking-field flexibility |
| Control Card | JCZ | Industrial laser control platform |
| Software | EZCAD2 / EZCAD3 | Supports common vector and marking workflows |
| Positioning | Red-Light Positioning | Helps position the marking area before processing |
Important: A 50W configuration is not automatically the best choice for every gold or silver jewelry product. The final laser power, lens and rotary configuration should be selected after testing the customer’s actual material and required marking effect.
Example: 50W Fiber Laser Configuration
The following values come from an actual JQ Laser industrial delivery configuration. They are provided as a technical reference, not as a universal specification for every gold and silver application.
| Parameter | Reference Configuration | Why It Matters |
|---|---|---|
| Laser Type | Pulsed Fiber Laser | General metal marking platform |
| Rated Power | 50W | Provides greater processing capacity than lower-power configurations |
| Wavelength | 1064 nm | Common wavelength for fiber laser metal marking |
| Cooling | Forced Air Cooling | No industrial water chiller required for this configuration |
| Power Supply | AC 220V ±10%, 50/60Hz | Suitable for standard industrial electrical environments using this supply |
| Main Marking Field | 110 × 110 mm | Suitable for many small and medium marking areas |
| Additional Lens | 150 × 150 mm | Provides additional marking-field flexibility |
| Control Card | JCZ | Industrial laser control platform |
| Software | EZCAD2 / EZCAD3 | Supports common vector and marking workflows |
| Positioning | Red-Light Positioning | Helps position the marking area before processing |
Important: A 50W configuration is not automatically the best choice for every gold or silver jewelry product. The final laser power, lens and rotary configuration should be selected after testing the customer’s actual material and required marking effect.
Common Gold & Silver Marking Problems
Most marking problems are not solved simply by increasing laser power. The first step is to identify whether the problem comes from the material, optics, focus, parameters or workholding.
The Mark Is Too Dark or Heat-Affected
If the customer wants a clean cosmetic mark but the surface becomes too dark or shows excessive thermal effect, increasing power is usually not the first solution.
Test different combinations of speed, frequency, pulse settings, hatch spacing and focus on the actual alloy.
The Mark Is Not Sharp Enough
Fine jewelry exposes optical and focusing problems more clearly than many industrial parts.
Check focal position, lens selection, beam alignment, marking speed and hatch settings before changing laser power.
Ring Marking Is Uneven
The marking distance changes when a curved ring is positioned incorrectly or the rotary setup is not suitable for the ring diameter.
Check the ring fixture, rotary axis, working distance and actual marking position.
The Customer Wants Deeper Engraving
Surface marking and deep engraving are different requirements. A shallow personalization application does not automatically require a high-power machine.
Define the required depth first, then test power, speed, frequency, hatch and number of passes.
Test Your Actual Gold or Silver Before Choosing the Machine
A product photo is not enough to determine the best laser parameters. If you have a real gold or silver sample, testing it before purchase can remove much of the uncertainty from the machine selection process.
Send Sample
Send the actual jewelry or material.
Define Result
Tell us whether you need contrast, personalization or depth.
Test Parameters
Test different process settings on the actual sample.
Confirm Configuration
Select power, lens and accessories based on the test.
Recommended information: material/alloy, jewelry type, marking file, desired marking appearance and approximate production volume.
Practical Advice From a Laser Marking Engineer

LEO has more than ten years of experience in the laser marking machine industry. He has extensive experience with laser marking applications across different industries and has participated in the design and implementation of multiple automated marking projects.
His practical work includes helping customers evaluate laser power, marking materials, optical configurations, fixtures, rotary systems and production requirements.
For jewelry applications, his approach is straightforward: understand the actual material and required marking result first, then select the laser configuration. A higher-power machine is not automatically the right answer.
Explore More Jewelry & Metal Marking Solutions
Jewelry Industry
Explore laser marking solutions for jewelry manufacturers, including rings, pendants and precious-metal components.
Jewelry Industry →Fiber Laser Marking Machine
General-purpose fiber laser marking systems for metals and selected industrial materials.
View Fiber Laser →MOPA Fiber Laser
Consider MOPA when pulse control and a wider process window are important for the application.
View MOPA Laser →20W Fiber Laser
A compact option for many personalization and general metal marking applications.
View 20W →30W Fiber Laser
A balanced configuration for general marking and increased production requirements.
View 30W →50W Fiber Laser
For higher throughput, deeper engraving and broader industrial metal-marking applications.
View 50W →How We Develop a Gold & Silver Laser Marking Process
For precious-metal jewelry, we normally start with the actual workpiece instead of choosing a laser only from a catalogue. The goal is to find a repeatable process that produces the required appearance without unnecessary laser power or complicated equipment.
Identify the Material
We first confirm whether the workpiece is gold, silver, an alloy, plated material or another precious-metal surface.
Define the Mark
We confirm the marking size, text, logo, pattern, required contrast, depth and whether the mark needs to be positioned on a flat or curved surface.
Develop Parameters
Laser power, speed, frequency, focus, hatch settings and the number of passes can then be tested against the required result.
Confirm Production Setup
After the marking result is confirmed, we determine the appropriate lens, fixture, rotary axis and machine configuration for production.
What We Check During Testing
- Marking contrast
- Edge definition
- Surface heat effect
- Marking depth
- Repeatability
- Cycle time
What We Do Not Recommend
- Choosing only by laser wattage
- Copying parameters from another alloy
- Buying a rotary axis without testing the ring
- Assuming a generic sample represents your product
- Comparing machines only by advertised scanning speed
Need help selecting the laser itself?Fiber Laser Marking Machine · MOPA Fiber Laser · 50W Fiber Laser
Choose the Machine Around Your Jewelry Business
Instead of starting with the machine model, start with the products you actually make. The following is a practical starting point for discussing the configuration with a laser supplier.
Personalized Jewelry Workshop
Main products are personalized rings, pendants and small jewelry pieces. Marking volume is moderate and deep engraving is not the main requirement.
20W or 30W fiber laser + suitable fixture. Rotary axis if curved jewelry is required.
Jewelry Production Workshop
The workshop handles regular production orders and needs a balance between marking quality, cycle time and equipment investment.
30W fiber laser is a practical starting point. Rotary and additional lens options can be considered according to the jewelry range.
Higher-Volume Jewelry Production
Production volume is higher, the machine will be used for deeper engraving, or the same machine will also process general metal components.
50W fiber laser with appropriate lens and fixture. Automation or vision can be evaluated when production volume justifies it.
One More Important Point About MOPA
If your jewelry application requires more flexibility in pulse parameters or you are developing a difficult marking effect, a MOPA fiber laser may be worth testing.It should not be selected simply because “MOPA is better”. The advantage only matters when the additional process control solves an actual marking requirement.Compare MOPA Fiber Laser →
A Sample Test Tells You More Than a Generic Product Video
When a supplier sends you a video of a gold ring being marked, it proves that the machine can mark that particular ring.It does not prove that the same settings will work on your alloy, your surface finish, your ring diameter or your required marking appearance.
For precious-metal applications, we recommend testing the actual workpiece whenever possible. This allows the machine configuration and process parameters to be discussed using a real production requirement instead of assumptions.
What to Send for a Useful Test
Gold, silver, alloy or plated material information.
Logo, text, pattern, serial number or other graphic.
Contrast, appearance, depth or cosmetic requirement.
Approximate daily volume and cycle-time target.
Gold & Silver Laser Marking FAQ
Can a fiber laser mark gold?
Yes. Fiber laser systems can be used for gold and gold-alloy jewelry. The final appearance depends on alloy composition, surface finish, laser configuration and process parameters.
Can a fiber laser mark silver?
Yes. Silver can be laser marked, but its reflective surface makes sample testing particularly useful when determining the desired marking appearance.
What laser power is best for gold jewelry?
There is no single best power. 20W can be suitable for many personalization applications, 30W provides additional production capacity, and 50W is more appropriate when higher throughput or deeper engraving is required.
Do I need a rotary axis for ring marking?
A rotary axis can be useful for marking around the circumference of rings and other curved jewelry. Flat pendants and plates generally do not require rotary equipment.
Should I choose 20W, 30W or 50W?
Choose based on the actual application. For mainly personalized jewelry, 20W or 30W may be sufficient. For higher production volume, deeper engraving or broader industrial use, 50W can be a better fit.
Can the same machine mark different gold alloys?
A suitable fiber laser system can be used across different gold alloys, but the parameter settings may need to be adjusted according to alloy composition and surface finish.
Should I test my jewelry before buying?
Yes. Testing the actual material is strongly recommended when the required marking appearance is important. It allows the supplier to evaluate power, speed, frequency, focus, lens and other process parameters before finalizing the machine.
Let’s Test Your Gold or Silver Before You Buy
Tell us what you are marking, what the jewelry is made of, the marking size and the result you want. We can then recommend a suitable laser configuration instead of simply choosing the highest wattage.
Recommended information: material · jewelry type · marking file · marking size · desired result · approximate production volume